React Native TS Template: A Practical Guide for Modern Apps
Learn what a React Native TS template is, how to choose one, and how to set up a production-ready typed starter for Expo, bare RN, and monorepos.
 Damini
You're at the terminal with a new mobile product in mind. The command is ready, but one decision still matters more than it appears: should the project begin as JavaScript with TypeScript added later, or should the starter already define the application as a typed system?
That choice affects more than file extensions. It influences how navigation parameters are modeled, where API contracts live, how state is shared, how contributors structure components, and how confidently the project can expand from one mobile surface to several. A React Native TypeScript template is therefore an architectural starting point, not a configuration chore.
Table of Contents
- Starting a New App with a React Native TS Template
- Why TypeScript Became the Default for React Native Projects
- Key Features That Define a Strong React Native TS Template
- Comparing Expo, Bare React Native, and Monorepo Templates
- Setting Up and Integrating a Typed Template the Right Way
- Where AppLighter Fits as an Opinionated Starter Kit
- Choosing the Right React Native TS Template for Your Build
Starting a New App with a React Native TS Template
A developer starting with npx create-expo-app or npx @react-native-community/cli usually thinks about the first screen, the backend, or the release target. The more consequential question is what the generated project assumes about code quality from its first commit.
A React Native TS template is a preconfigured project scaffold for TypeScript-based React Native development. It typically includes a tsconfig.json, typed entry points, React and React Native definitions, and a folder structure designed for typed components rather than a JavaScript project that will be retrofitted later. The practical distinction is visible as soon as a screen needs navigation params, theme values, API data, or shared state.
In a JavaScript-first project, those contracts often live in developer memory, comments, or runtime checks. In a typed scaffold, the project can describe them directly in code. A screen can declare which route params it accepts. A store can expose the shape of its state. An API wrapper can turn an unexpected response into a visible development error instead of allowing malformed data to travel unnoticed into the interface.
The first architectural decision
Consider a small product with authentication, a tab navigator, remote data, and a shared design system. The team can create screens quickly in either approach. The difference emerges when the second or third contributor changes a route name, adds an optional property, or reuses a component in a context the original author didn't anticipate.
A typed foundation makes those changes easier to inspect. It doesn't prevent every runtime failure, and it won't replace integration tests, but it moves many interface mistakes closer to the point where they're introduced. That matters for navigation graphs, theming objects, Redux Toolkit or Zustand stores, and API clients that cross the boundary between your code and an external service.
Practical rule: Choose the scaffold that reflects how you want the codebase to behave after the first feature, not only how quickly it creates the first screen.
The strongest starter kits also remove glue work that tends to be postponed. They establish conventions for src, assets, locales, reusable UI, services, and tests. They make the intended seams visible before the codebase becomes a collection of unrelated folders. A useful overview of how structured mobile starters support this kind of early architectural work is available in this guide to mobile app templates.
The right choice won't eliminate technical decisions. It will make those decisions deliberate. The wrong choice often creates a migration project disguised as a series of small TypeScript changes.
Why TypeScript Became the Default for React Native Projects
React Native's official documentation now states that new React Native projects target TypeScript by default, while popular templates such as Ignite also use TypeScript as their default. The documentation also describes modern project creation workflows, including Expo-based setups that can install and configure TypeScript when a .ts or .tsx file is added. You can verify the current guidance in the official React Native TypeScript documentation.
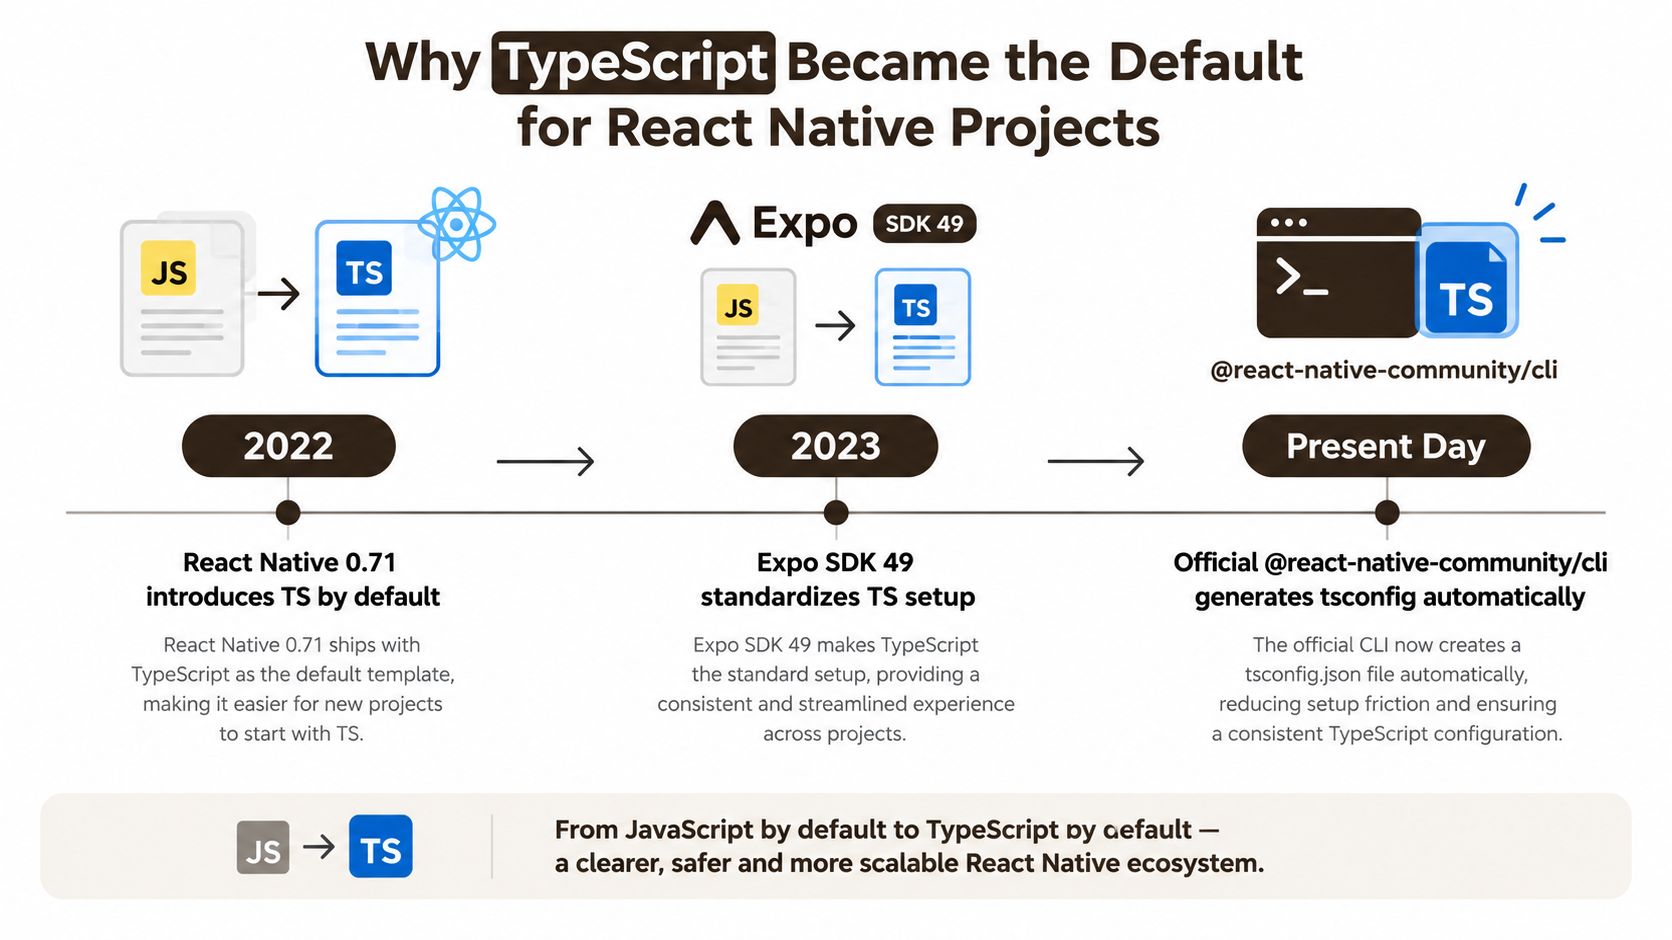 A timeline infographic illustrating the shift from JavaScript to TypeScript as the default in React Native projects.
That change marks an important shift in project design. TypeScript used to be treated as an optional layer that teams could add after validating an idea. New projects increasingly begin with typed scaffolding instead, so the question isn't whether TypeScript belongs in a greenfield application. The more useful question is whether the selected template gives the team a disciplined foundation.
What typed defaults change in daily work
Typed navigation is one of the first benefits developers notice. A route's params can be represented as a contract, which gives the editor useful completion and flags incorrect calls before the application reaches a device. The same principle applies to component props, style tokens, reducer actions, and server responses.
TypeScript also improves the boundary between application layers. A state slice can expose a known shape. A theme can require approved values. An API client can make loading, success, and error states explicit. These checks don't guarantee that a server behaves correctly, but they reduce the number of assumptions hidden inside screen components.
JavaScript-only projects still have a legitimate place. A legacy application may depend on untyped libraries, a team may be completing a staged migration, or a prototype may need to preserve an existing runtime. Those are concrete constraints. They aren't a strong reason to make JavaScript the default for a new product when the surrounding React Native tooling already supports typed project creation.
For teams tracking broader software development changes, software engineering modernization insights provide useful context for why typed interfaces, automation, and repeatable delivery practices increasingly belong in the starting point rather than at the end of a project.
The result is a more useful framing: a React Native TS template is now a baseline option for modern app creation. A team should depart from it only when a specific dependency, migration requirement, or delivery constraint justifies the trade-off.
Key Features That Define a Strong React Native TS Template
Not every TypeScript starter deserves the same trust. Some only rename the entry file and add a permissive compiler configuration. A production-oriented template should make incorrect patterns harder to introduce and common patterns easier to repeat.
Compiler configuration should be intentionally strict
Start with tsconfig.json. A serious template should use strict checking and should make unused code visible through options such as noUnusedLocals. The exact configuration can vary by project, but a permissive setup defeats much of the value of adopting TypeScript.
Look for a clean src layout and path aliases that resolve consistently in the TypeScript compiler, Metro, Jest, and the editor. An alias that works in VS Code but fails in tests is not a convenience. It's a source of avoidable friction.
A useful audit checklist includes:
- Strictness: Confirm that strict checking is enabled rather than relying on broad implicit types.
- Unused code detection: Check that unused locals and imports do not accumulate unnoticed.
- Alias consistency: Verify that aliases resolve in application code, tests, and the bundler.
- Type ownership: Identify where shared domain types, API types, and UI types should live.
- Folder conventions: Look for documented locations for assets, locales, screens, services, and components.
Navigation and data boundaries need real types
A starter should model navigation with the TypeScript helpers provided by React Navigation or with the typed route support available through the selected routing system. A route that accepts an identifier shouldn't be callable with an unrelated object just because both values happen to be JavaScript objects.
The API layer deserves the same attention. A thin wrapper around fetch or Axios can centralize headers, errors, serialization, and response typing. For larger products, a generated SDK from an OpenAPI specification, TanStack Query, or tRPC can give the application a clearer boundary than individual screens making ad hoc requests.
Environment handling belongs outside components too. Whether the project uses Expo constants or another environment mechanism, a single typed module should expose configuration values. That keeps configuration assumptions out of UI code and makes missing values easier to detect during development.
Quality gates separate a starter from a demo
A template becomes more useful when it protects its own conventions. TypeScript-aware ESLint rules, Prettier, and a pre-commit hook provide a shared baseline before multiple contributors start making independent formatting and typing decisions.
Testing should also be ready to run. Jest configuration, React Native testing utilities, and a clear location for tests reduce the temptation to postpone verification until the application is large. A component library such as React Native Paper, Tamagui, or NativeWind can be appropriate, but the important criterion is that its usage is demonstrated and tested rather than merely listed as a dependency.
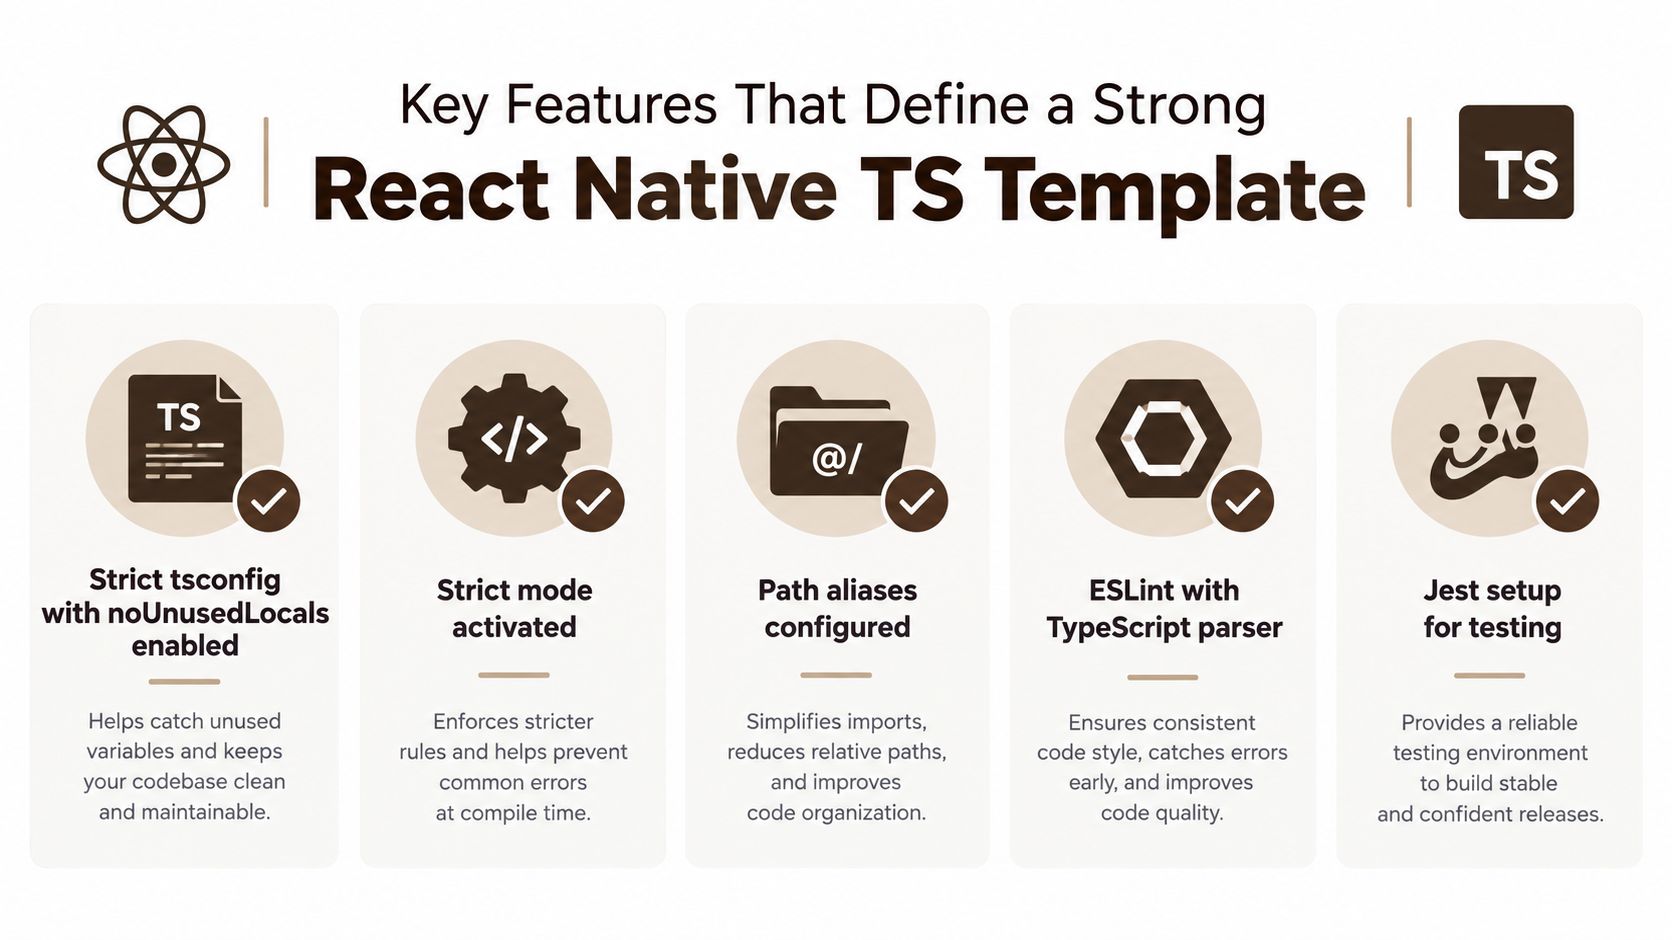 A graphic highlighting five key features of a strong React Native TypeScript template including strict configuration and testing.
Use the checklist as a scoring rubric. A template that only includes TypeScript syntax support may be acceptable for a short experiment. A template intended for a product should also explain how navigation, configuration, testing, linting, assets, and shared types fit together.
Comparing Expo, Bare React Native, and Monorepo Templates
The starting point should match the hardest constraint in the product. Expo reduces the amount of native setup a team owns. Bare React Native gives the team direct control over native projects. A monorepo creates a home for shared packages, but it introduces workspace boundaries and build coordination that a single app doesn't need.
| Dimension | Expo Template | Bare React Native | Monorepo Template |
|---|---|---|---|
| Setup time | Fast path with conventions already in place | More native project ownership from the beginning | More workspace and package setup before feature work |
| Native module freedom | Strong support through the Expo ecosystem and config plugins, with constraints around unsupported native requirements | Direct access to Xcode, Gradle, CocoaPods, and custom native code | Depends on the underlying app setup, with shared packages layered on top |
| EAS and over-the-air support | Fits naturally with Expo's build and delivery services | Can use Expo services, but the team owns more native configuration | Requires coordinated app, package, and CI configuration |
| Testing maturity | Easy to standardize when the template includes the test setup | Flexible, but the team must establish more conventions | Strong for shared packages when boundaries and test commands are explicit |
| Scaling beyond one app | Works well while the product remains within the selected runtime model | Useful when native specialization is central | Designed for shared code across mobile, web, and supporting packages |
| Onboarding cost | Lower when the team follows the intended Expo path | Higher because contributors need native project context | Higher because contributors need app and workspace context |
Expo is the sensible default for many teams
An Expo-based React Native TS template is often the most efficient choice for a product that needs iOS, Android, and possibly web support without immediate ownership of every native build detail. Config plugins can bridge many native requirements, and the managed workflow keeps the initial project surface focused.
The trade-off is real. A native dependency that doesn't fit the supported workflow can force a configuration decision, a custom development build, or a move toward more direct native ownership. Teams shouldn't choose Expo because native concerns don't matter. They should choose it when the available Expo path covers the product's actual requirements.
Bare React Native is about control, not prestige
A bare starter makes sense when the application depends on custom native modules, specialized platform behavior, or a native build process the team needs to control directly. It avoids pretending that every project has the same runtime needs.
The cost is operational ownership. Developers must understand the interaction between JavaScript, Xcode, Gradle, CocoaPods, signing, and native dependency updates. That can be the correct trade, but it isn't free. Teams evaluating cross-platform product strategy can also consult Arch's analysis of cross-platform app development for a broader way to think about shared code and platform-specific requirements.
Monorepos solve a different problem
A monorepo is useful when shared types, UI packages, web applications, and mobile applications are already part of the product plan. Yarn workspaces, Nx, and Turborepo can organize that code, but they don't remove complexity. They introduce package boundaries, dependency policies, task pipelines, and CI decisions.
Don't select a monorepo because it sounds scalable. Select it when shared ownership is a present requirement. If the project is one mobile app with no clear package boundary, the workspace can become an expensive abstraction. Teams that want to compare runtime and architecture choices in more detail can use this React Native performance comparison as one input, not as a substitute for testing their own product.
Setting Up and Integrating a Typed Template the Right Way
A template saves time only if the team preserves its boundaries after the first feature lands. The safest setup sequence starts with compiler behavior, then establishes navigation and data contracts, and finishes by automating the rules contributors need to follow.
Start with one source of truth
Use a strict tsconfig.json as the base. Options such as strict, noUnusedLocals, noUncheckedIndexedAccess, and exactOptionalPropertyTypes expose different classes of uncertainty. They can require cleanup in existing code, but that friction is preferable to accepting assumptions without question, assumptions that later appear as runtime defects.
Configure path aliases from the same source of truth used by the editor, Metro, and Jest. An import such as @/features/account should resolve identically in production code and tests. If each tool has a slightly different alias map, contributors will lose time debugging infrastructure rather than application behavior.
Model navigation before adding screens
Define a root param list, then compose nested navigators from explicit route contracts. A screen that needs a user identifier should receive that identifier through a declared route type, not through an unstructured object passed between components.
This prevents a common failure mode: route names and parameter shapes drifting apart as the application grows. It also makes refactoring safer because the compiler can identify callers that need to change.
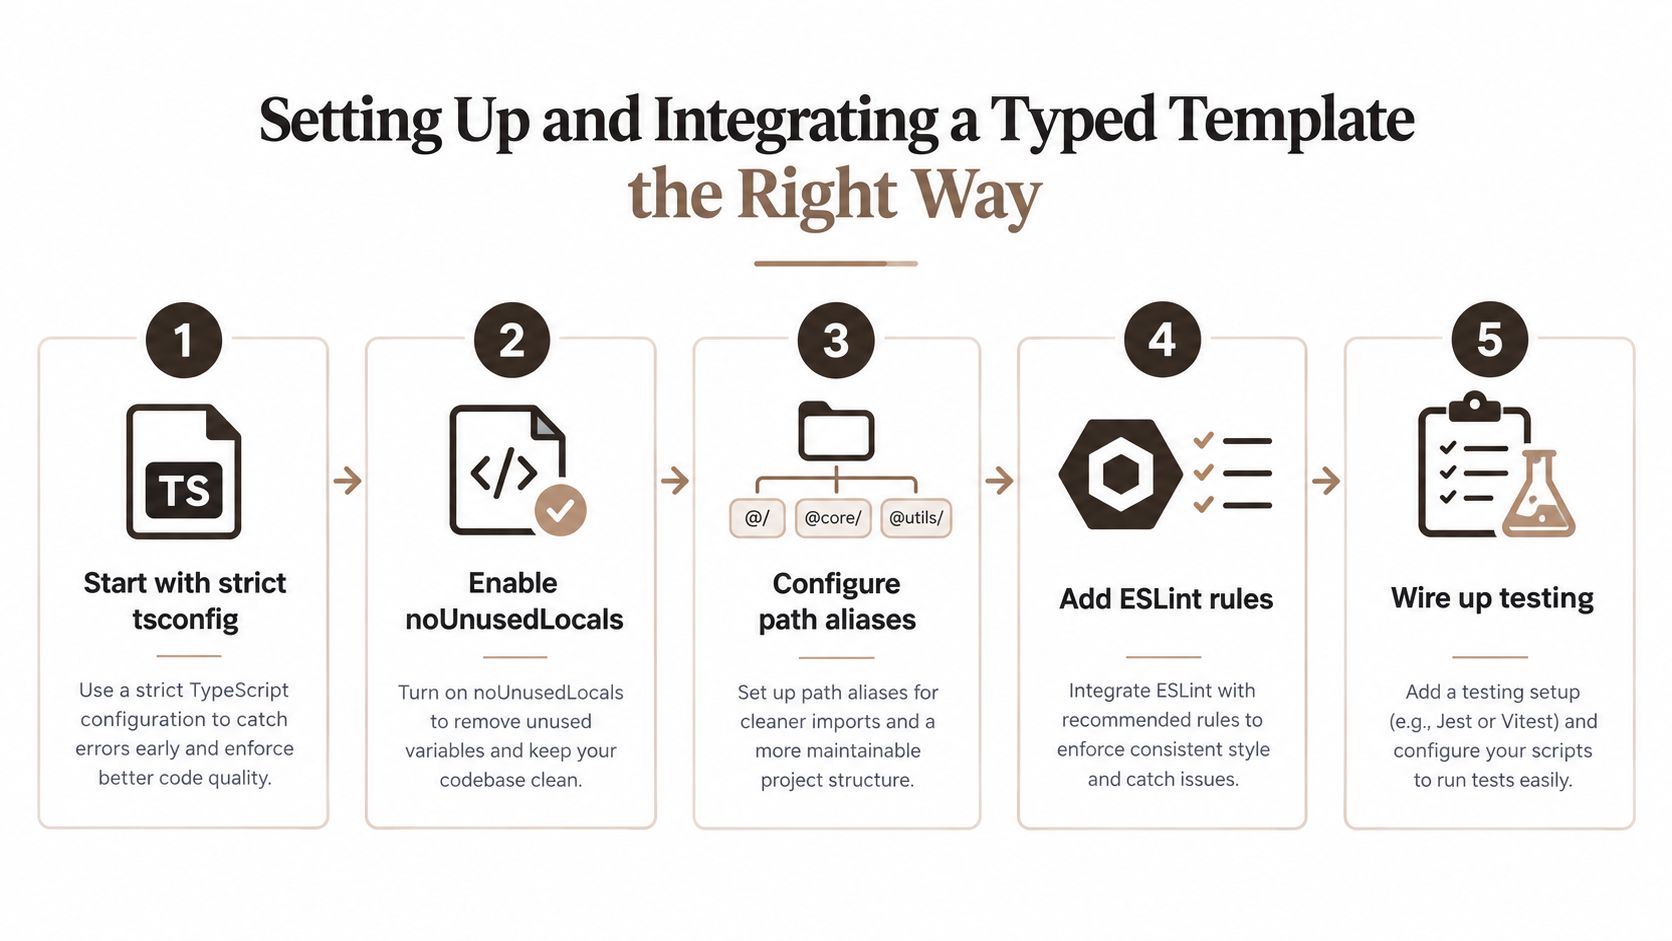 A five-step guide for setting up and integrating a strictly typed project template for better code quality.
Keep external data at an explicit boundary
Create one typed API module rather than calling fetch from each screen. TanStack Query can manage server state, tRPC can connect typed procedures, and a generated SDK can reflect an OpenAPI contract. The choice depends on the backend, but the architectural rule stays the same: screens shouldn't need to understand transport details and response parsing.
Use a single environment module for configuration. Components should consume a typed value such as an API client or feature flag, not read raw environment variables directly. This reduces accidental exposure of configuration and makes missing values easier to identify during local development and builds.
Automate consistency before the team expands
Add typescript-eslint, ESLint rules, Prettier, and a pre-commit hook while the codebase is still small. The hook should check the files being committed, while CI should run the complete validation set. Jest belongs in that same workflow, with tests placed according to a documented convention.
A short process walkthrough can complement the written setup:
This order prevents rework. Compiler rules expose weak types, navigation types define screen contracts, the API module defines external data boundaries, and automated checks keep those decisions consistent when new contributors join.
Where AppLighter Fits as an Opinionated Starter Kit
A bare scaffold gives you room to decide everything. That freedom is useful when the team already has a preferred architecture, native requirements are unusual, or the application is intended to become a shared platform. It also means the team must connect the compiler, navigation, state, environment handling, testing, and release workflow before those pieces provide value.
AppLighter fits the other side of that decision. It is an Expo-based starter with TypeScript, navigation, backend integration, state management, reusable UI, and development tooling arranged as a working product foundation. The relevant distinction isn't that it removes architectural judgment. It makes a set of those judgments visible and available for modification instead of asking a small team to assemble every layer from an empty repository.
The trade-off is opinionated structure
An opinionated starter can lock a team into choices it doesn't understand. That risk is legitimate. If the template hides its routing, state, or API seams, replacing one layer later can be harder than building the application without the starter.
A usable starter should expose those seams. The team should be able to locate the navigation graph, change the state layer, replace a backend adapter, adjust the folder convention, and remove tooling that doesn't fit. Review the generated code before committing to it. A template is an accelerator only when its abstractions remain understandable.
The strongest use case is a small team that needs a coherent first sprint, an early-stage product that can't justify infrastructure assembly, or a cross-platform app that fits Expo's runtime model. Teams with a specialized native dependency or an established monorepo architecture may be better served by a narrower React Native TS template.
For a practical view of how starter structure affects day-to-day delivery, this guide to improving developer productivity is a useful companion. The central lesson is simple: pre-wiring helps when it removes repeated setup, not when it conceals decisions.
Choosing the Right React Native TS Template for Your Build
Use three questions to narrow the choice:
- How large is the initial team and codebase? A solo developer or small product team usually benefits from the smallest coherent Expo TypeScript starter. A team sharing packages across products needs stronger workspace boundaries.
- Which native modules are essential? If the product depends on custom native behavior that doesn't fit the intended Expo path, start with a bare typed project instead of planning a migration around an assumption.
- How soon must the first release be repeatable? A template with tested commands, CI, environment handling, and a documented build path is more valuable when the team needs reliable delivery early.
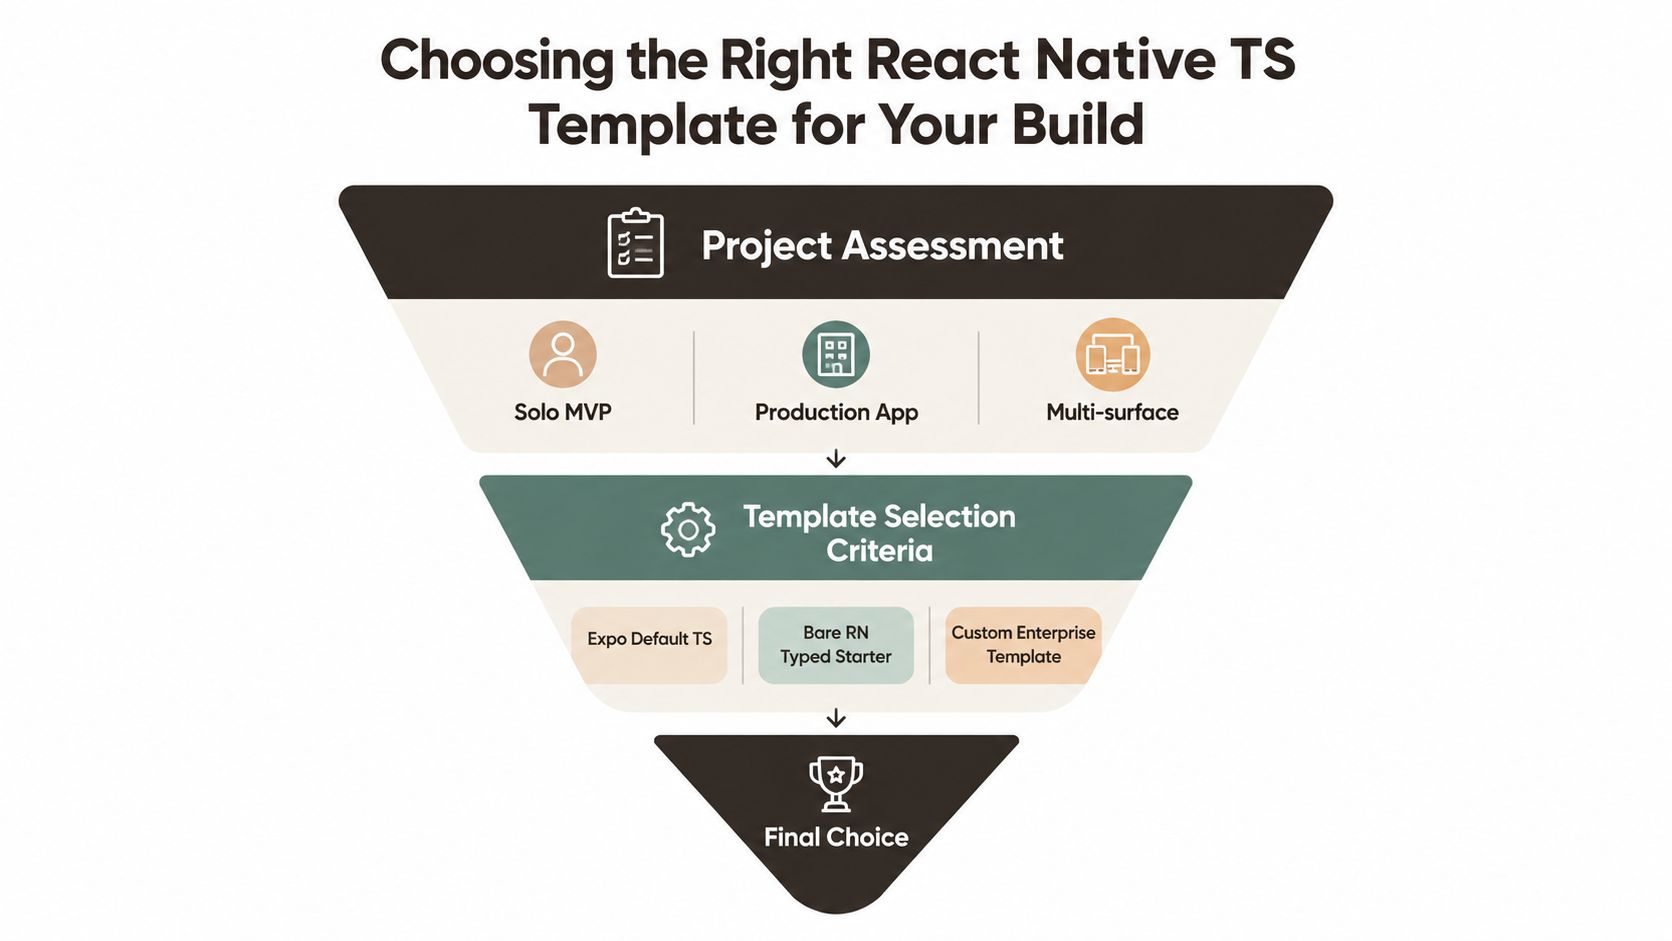 A funnel diagram illustrating the process for choosing the right React Native TypeScript template for projects.
The decision usually follows this pattern:
- Solo MVP: Choose Expo's default TypeScript template when the product has ordinary platform needs and the priority is reaching a usable first version without unnecessary native ownership.
- Production app with native control: Choose a bare React Native typed starter when native modules, platform customization, or build ownership are central requirements.
- Multi-surface product: Choose a monorepo template when shared types, packages, web code, and multiple applications are active requirements rather than future possibilities.
Use testing and CI readiness as tie-breakers. A visually polished scaffold with no working validation commands creates more work than a plain starter with clear checks.
The opinionated recommendation is to choose the lightest template that covers your hardest real constraint. Don't add a monorepo because you might build another app, and don't accept a bare workflow because it sounds more professional. Start with the smallest typed foundation that matches today's requirements, then upgrade when the product gives you evidence that the current boundary is no longer enough.
AppLighter provides a preconfigured Expo and React Native foundation with TypeScript, navigation, backend integration, state management, and cross-platform app structure already connected. If you want to evaluate an opinionated React Native TS template against your own first-sprint requirements, visit AppLighter and review the available starter workflow.