Mobile App Development Cost Calculator Guide
Use our mobile app development cost calculator to get a realistic budget estimate. Learn the key factors that drive app costs and how to save money.
Ask any developer for a price to build an app, and you'll probably get the same answer: "It depends." Frustrating, right? But it's the truth. The cost can swing from $15,000 for a bare-bones Minimum Viable Product (MVP) all the way past $400,000 for a sophisticated, feature-packed platform.
The final number isn't pulled out of thin air. It’s a direct reflection of your project's scope, the technology stack you choose, and the team you bring on board. Think of your budget as the financial blueprint for turning a concept into a working app in the hands of users.
How Much Does It Really Cost to Build an App?
Figuring out the real-world investment for your app is the first, most crucial step for any founder. The cost isn't a single, fixed price; it's a spectrum. It’s a lot like building a house—the cost is dictated by the blueprints you draw up. A simple "studio apartment" app with one core function is a world away from a sprawling "smart mansion" loaded with custom integrations and advanced tech.
To make sense of it all, you first need to understand the different tiers of app complexity. Each one comes with its own typical budget and timeline. This helps you figure out where your project fits and set financial expectations that are actually grounded in reality.
Classifying Your App By Complexity
Most app ideas fall into one of three main buckets, and knowing which one is yours is key to estimating the cost.
-
Simple Apps (MVPs): These are the essentials-only builds. They’re laser-focused on a single core feature, like a basic to-do list or a simple unit converter. You'll find minimal screens, a clean UI, and no heavy backend lifting.
-
Mid-Complexity Apps: This is where things get more interesting. These apps usually have features like user profiles, payment processing, social media logins, and a dashboard for an admin to manage things. A small ecommerce shop or a fitness tracking app are perfect examples.
-
Complex Apps: These are the big leagues. We're talking about on-demand services like Uber, social networks, or fintech platforms. They demand intricate backend systems, real-time data synchronization, robust security, and often a whole web of third-party API integrations.
The single biggest mistake I see founders make is underestimating complexity. A feature that sounds simple on paper, like real-time chat, can easily add tens of thousands of dollars and weeks of development time to your project.
Industry data paints a pretty clear picture of these cost brackets. A recent in-depth analysis found the average cost to develop a mobile app hovers around $90,780. But that's just an average.
For startups, a simple app often lands in the $15,000–$50,000 range. Mid-tier projects usually fall between $50,000–$120,000, while complex, enterprise-level apps can easily shoot past $120,000–$200,000, especially if you're working with AI or real-time features. To get a deeper dive, you can read the full research about mobile app development pricing to see how the numbers break down.
To give you a clearer snapshot, here’s how complexity generally translates into real numbers.
Estimated App Development Costs By Complexity
This table gives you a ballpark idea of what to expect for costs and timelines based on where your app idea fits. It's a great starting point for categorizing your project and setting a realistic budget.
| Complexity Level | Estimated Cost Range | Typical Timeline |
|---|---|---|
| Simple App (MVP) | $15,000 – $50,000 | 2 – 4 Months |
| Medium Complexity App | $50,000 – $120,000 | 4 – 9 Months |
| Complex Enterprise App | $120,000+ | 9+ Months |
As you can see, the jump from a simple MVP to a complex, multi-feature app is significant—not just in dollars, but in the time it takes to get to launch. This is why a detailed project scope is non-negotiable before you start writing checks.
The Core Factors That Drive Your App Budget
Now that you have a rough idea of the numbers, let's pull back the curtain on why they are what they are. A mobile app development cost calculator isn't just a random number generator. It’s a sophisticated tool that weighs several critical variables, each one directly impacting the time, effort, and expertise your project will demand. Getting a handle on these factors is the first step toward making smart, budget-conscious decisions.
I like to think of building an app like buying a new car. The base model has a sticker price, but every single upgrade—a bigger engine, leather seats, a premium sound system—tacks more onto the final bill. The factors below are your app’s upgrades.
This visual gives you a quick breakdown of how costs scale with an app's overall complexity.
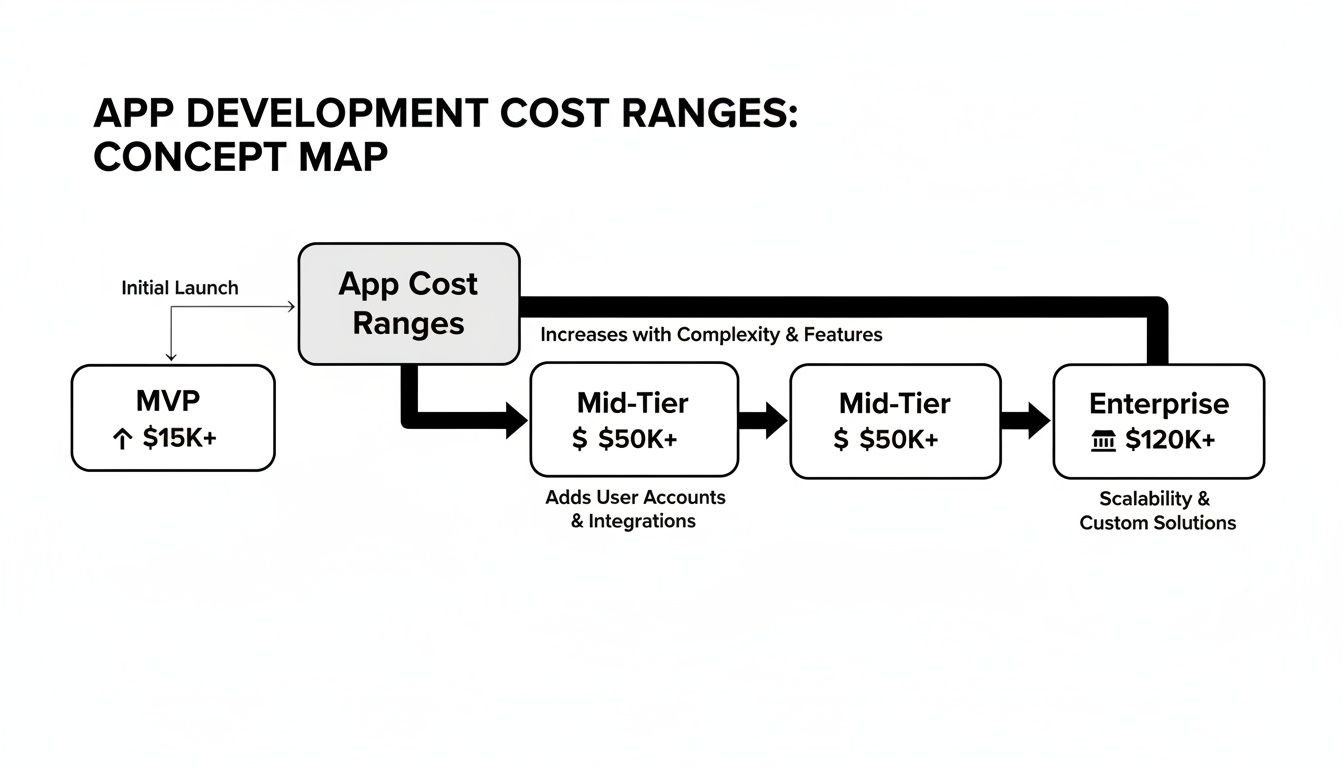 Concept map illustrating app development cost ranges from MVP to Enterprise, showing cost increases with complexity and features.
As you can see, the jump from a simple proof-of-concept to a full-blown enterprise solution is massive. Let's dig into the specific components that create that gap.
App Features and Functionality
Without a doubt, this is the biggest driver of your final cost. Every feature is like adding another room onto a house—it needs its own plan, its own materials, and its own specialized labor. Simple things like a user login screen or a basic contact form are relatively cheap and easy to build.
But the price tag climbs quickly as you add more advanced functions.
- Payment Gateways: You can’t just drop in a “buy” button. Integrating a system like Stripe or PayPal requires hours of work to ensure everything is secure and compliant.
- Real-Time Chat: What seems like a simple chat window actually involves a ton of complex backend engineering to make sure messages are sent, received, and stored instantly.
- AI and Machine Learning: If you want a recommendation engine or personalized content feeds, you’re entering a different league. This requires specialized data science and development skills that can increase costs by anywhere from 30% to 300%.
UI/UX Design Complexity
An app’s design is so much more than colors and fonts; it’s the entire experience. It’s how it feels to use it. A straightforward, template-based design can keep costs down. But if you're after a completely custom interface with slick animations and carefully mapped-out user journeys, you're looking at a significant investment in a skilled design and development team. A high-end user experience can easily eat up 10-20% of the total project budget.
A clunky user experience is one of the top reasons apps get deleted. Investing in good design isn't a splurge—it's a critical investment in keeping your users around.
Platform Choice and Technology Stack
So, who are you building for? Apple users on iOS? Google users on Android? Or both? Building two separate "native" apps—one for each platform—will give you the absolute best performance and feel, but it also nearly doubles your development costs. It’s essentially two different projects.
This is where cross-platform tools like React Native can be a game-changer. You write the code once and it works on both iOS and Android. This approach can seriously cut down on development hours and makes future updates much simpler. The backend technology, databases, and APIs you choose also play a huge role in the final cost.
Post-Launch Maintenance and Support
The spending doesn't stop when your app hits the store. You have to keep the lights on. Ongoing maintenance is absolutely essential for squashing bugs, updating for new operating systems (like a new iOS version), and patching security holes. A good rule of thumb is to budget 15-20% of the initial development cost per year for this. Factoring this in from the very beginning is crucial if you want your app to have a long and healthy life.
Native vs. Cross-Platform: The Million-Dollar Decision
One of the first big decisions you'll face—and one that will massively influence your budget—is how to actually build your app. Will you create two separate, highly specialized apps, one just for iPhones and another just for Androids? Or will you build a single, versatile app that works on both? This is the fundamental choice between native and cross-platform development.
Think of it like building a house. Native development is like hiring two different architects to build two custom homes—one perfectly suited for a snowy mountain climate and the other for a humid, tropical beach. Each home is optimized for its environment, delivering peak performance and comfort. But, you're paying for two sets of blueprints, two construction crews, and two different sets of building materials. It’s the premium, high-cost route.
Cross-platform development, on the other hand, is like designing one brilliant, adaptable house with a state-of-the-art climate control system that makes it comfortable anywhere. You build it once, and it works just as well in the mountains as it does on the beach. You get the job done with far greater efficiency.
The Financial Impact of Your Tech Choice
From a purely financial standpoint, the difference is night and day. Going native means you’re effectively funding two separate projects from start to finish.
This approach requires:
- Two Separate Codebases: Your team has to write and manage completely different code for iOS (typically using Swift) and Android (using Kotlin or Java).
- A Larger Development Team: You often need to hire developers who specialize in each platform, which can increase your team size and make project management more complex.
- Longer Timelines: Building two apps, even at the same time, simply takes longer. More time means more money spent on development.
This is exactly why technologies like React Native have become so popular, especially for startups and businesses that need to be smart with their spending. By using a single JavaScript codebase, your team can build an app that runs smoothly on both iOS and Android from day one.
This unified approach doesn't just cut your initial development hours in half; it also streamlines future updates. A single feature update can be rolled out to all users at once, rather than requiring separate efforts for each platform.
Quantifying the Savings
The numbers really tell the story here. Choosing cross-platform development with a framework like React Native can be 30-50% less expensive than building two native apps from scratch.
For a typical project, that could mean a budget of $30,000–$100,000 for a cross-platform app, versus $60,000–$300,000+ for the native equivalent. Why such a big gap? A single codebase can slash development time by up to 40%, which directly cuts down on your biggest expense: labor. It also makes the testing process much simpler and faster.
For startups and independent creators, this kind of efficiency isn't just a nice-to-have; it's often the one thing that makes launching the app possible in the first place. If you're looking for a deeper dive, you can discover more insights about mobile app costs and how technology choices impact your bottom line.
Use Our Interactive Mobile App Cost Calculator
Reading about cost drivers gives you the theory, but what you really need is to see how those choices affect your budget in real time. That's why we built an interactive tool—to turn abstract concepts into a concrete estimate for your project.
Think of it less like a simple form and more like a dynamic budgeting partner.
As you click through the options, from your target platform to the complexity of your features, you’ll watch the estimated cost and timeline adjust instantly. This is where the magic happens. It lets you play with the "what-ifs." You can see exactly how much a simple user login impacts the budget versus a complex, real-time data sync.
How to Get Your Custom Estimate
Getting started is easy. The calculator walks you through a few key questions, breaking down your app idea into the core components that drive the final cost.
- Platform Selection: Are you aiming for iOS, Android, or both? We'll show you how a cross-platform approach using a framework like React Native can make a real difference in your budget.
- Design Complexity: Do you have a simple, clean UI in mind, or are you envisioning a completely custom design loaded with unique animations?
- Feature Set: Pick and choose the features you need. This can be anything from basic user profiles and push notifications to more advanced integrations like payment gateways or AI-powered recommendation engines.
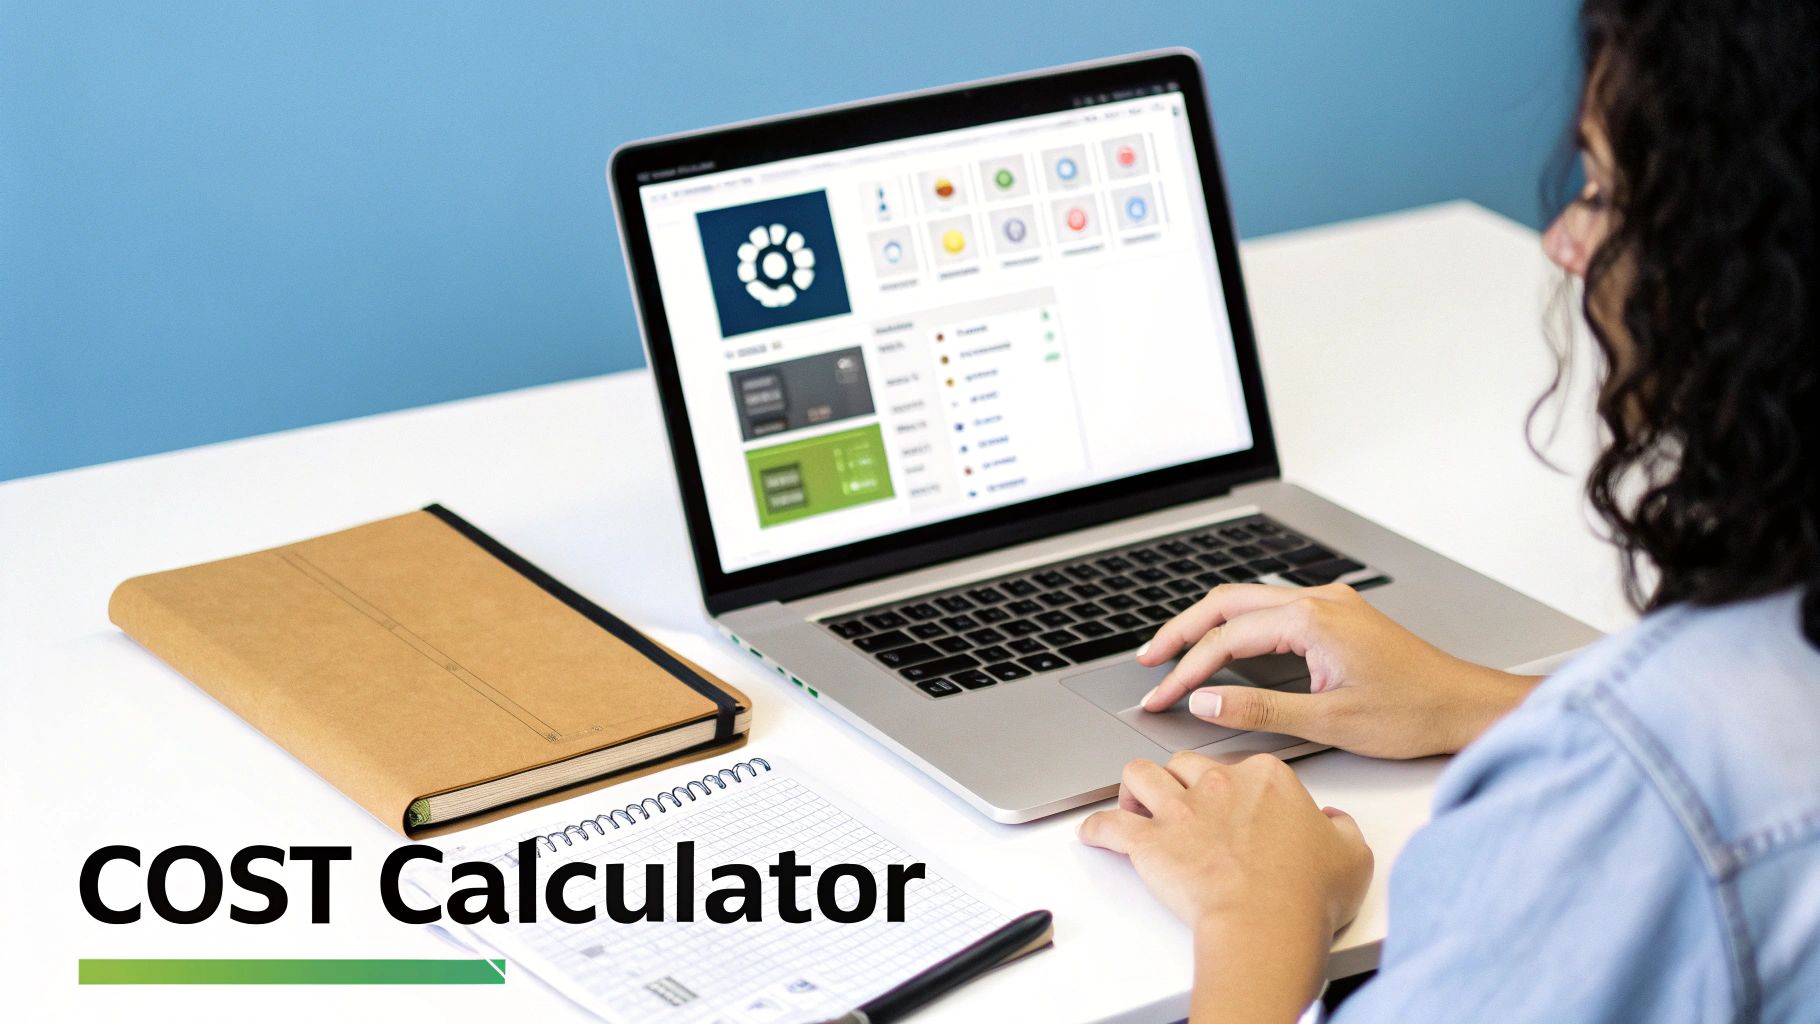 A person works on a laptop displaying an application interface, with 'COST Calculator' text prominent on a desk.
The real value here is seeing how each toggle and selection immediately moves the needle on the final numbers. It empowers you to experiment with different feature sets until you find the perfect balance for your budget.
By the end, you won’t just have a number. You’ll have a clear, data-driven cost range that transforms your idea from a back-of-the-napkin sketch into a tangible financial plan.
This estimate gives you the confidence to start planning, share projections with stakeholders, and make truly informed decisions about your project's scope. Go ahead and give it a try—your personalized budget is just a few clicks away.
How to Reduce App Costs Without Sacrificing Quality
So, you've used a mobile app development cost calculator and have a number staring back at you. The next question is almost always, "How can I make that number smaller?" Good news: lowering your development costs doesn't mean you have to gut your app's core vision or skimp on quality. It’s all about making smart, strategic decisions.
Think of your budget not just as money to be spent, but as a resource to be allocated wisely. The real goal is to pour your investment into the features that deliver the most immediate value to your first users. Prove the concept first, then you can worry about adding all the bells and whistles.
 Two professionals analyzing financial data to reduce costs with a laptop, smartphone, and documents.
Start with a Minimum Viable Product
By far, the most effective strategy for keeping costs in check is to launch with a Minimum Viable Product (MVP). An MVP isn't a cheap, stripped-down version of your app. It's a focused version that contains only the essential features needed to solve one core problem for your target audience. This approach gets you to market fast, allowing you to validate your core idea with real user feedback.
For startups, this lean method is an absolute game-changer. It's no surprise that 90% of successful apps started out as MVPs, letting founders test their market fit for a fraction of what a full build would cost. You can often get an MVP developed in just 2-4 months for around $10,000–$50,000, which can save you up to 70% on your total budget. You can learn more about how MVPs reduce app development costs and get you to launch day sooner.
When you start small, you avoid blowing a fortune on features users might not even want. Instead, their feedback becomes the roadmap for what you build next.
Prioritize Features Ruthlessly
Once you’ve embraced the MVP mindset, it's time to get tough with your feature list. Every single feature adds complexity, time, and cost to the project, so you have to be ruthless about what makes the cut for version one.
A fantastic way to tackle this is with the MoSCoW method:
- Must-Have: These are the non-negotiable, core features. Without them, the app simply doesn't work.
- Should-Have: Important features that add a lot of value but aren't absolutely critical for the first launch.
- Could-Have: These are the "nice-to-have" features you can add down the line if time and budget allow.
- Won't-Have: Features that are definitely out of scope for the initial release.
Using a framework like this forces you to draw a clear line between essential functionality and everything else, ensuring your budget is spent on what truly matters.
The goal of an MVP is to learn, not to build a perfect product. Focus on the one or two features that solve a real pain point for your users, and get that into their hands as quickly as possible.
Accelerate Development with a Starter Kit
Another powerful way to slash costs is to stop reinventing the wheel. Every mobile app needs the same foundational pieces: user authentication, navigation, push notifications, and state management. Building these common components from scratch is a massive drain on time and money.
This is where a production-ready starter kit like AppLighter can give you a massive head start. Think of it like buying a prefabricated home frame instead of building one from the ground up. You get all the essential, time-consuming infrastructure pre-built and ready to go, saving potentially thousands of dollars and months of development work.
This approach frees up your team, your timeline, and your budget to focus on building the unique, standout features that will actually make your app succeed.
Got Questions About App Costs? We've Got Answers.
Even with a detailed guide and a cost calculator in hand, putting together a budget for a new app can feel a little fuzzy. It's completely normal to have questions pop up as you try to connect your big vision to a real-world financial plan. We get these questions all the time from founders and product managers, so we’ve put together some straight-to-the-point answers.
Think of this as your final sanity check, making sure you’ve covered all the financial bases before you dive in.
How Accurate Is a Mobile App Development Cost Calculator?
A cost calculator is your best first guess—it gives you a solid ballpark figure, not a line-item quote chiseled in stone. It’s a lot like using an online tool to estimate a kitchen remodel. The calculator can get you close, but it can’t know if you’re going to pick marble countertops or laminate, or if there's a plumbing issue hiding behind the drywall.
These tools are fantastic for initial planning and for getting a feel for what really drives the price up. But the final, locked-in cost will always come down to a detailed project scope, the specific tech you choose, and any curveballs that come up along the way. For a precise number, you’ll need to sit down and talk specifics with a development team.
What Are the Hidden Costs of App Development?
The initial build is just the beginning. A few ongoing costs can catch you by surprise if you aren't ready for them. We don't really think of them as "hidden" so much as "the next chapter" in your app's life.
Here’s what to plan for:
- Post-Launch Maintenance: This is the big one. Budget around 15-25% of your initial development cost per year for upkeep. This covers essential bug fixes, keeping up with OS updates from Apple and Google, and patching security vulnerabilities.
- Infrastructure Costs: Your app needs a home on the internet. This means monthly or yearly fees for servers, databases, and hosting services that keep it running.
- Third-Party Service Fees: Does your app use maps, process payments, or send notifications? Many of these functionalities rely on external services like Stripe or Google Maps, which often have their own subscription fees.
- App Store Fees: Both Apple and Google take a cut for listing your app and handling in-app purchases.
Building these into your financial model from the get-go is the key to making sure your app has a long and healthy life.
How Can a Starter Kit Significantly Lower My Costs?
A starter kit is a game-changer because it means you're not building everything from the ground up. Think about it like building a house. Instead of paying a crew for weeks to pour the foundation, put up the frame, and add the roof, you start with a high-quality, pre-built structure. The time and money you save on the fundamentals is enormous.
A starter kit does exactly that for your app. You don't have to pay developers for hundreds of hours to handle basics like user logins, screen navigation, or data management. You start with all of that already built, tested, and ready to go. This can easily save you $5,000 to $20,000+ in upfront costs and shave weeks off your timeline, giving you a serious head start on the competition.
How Much Does App Design Really Cost?
Good UI/UX design isn't just an expense; it’s one of the most important investments you'll make in your app's success. It typically makes up about 10-20% of the total development budget. So, for a project with a $100,000 budget, you should plan on dedicating $10,000 to $20,000 to design.
This covers the entire creative process—from user research and wireframing all the way to beautiful, high-fidelity mockups and interactive prototypes. It’s tempting to try and skimp here, but a clunky, confusing user experience is one of the top reasons apps fail. Investing in quality design is a direct investment in keeping your users happy and coming back.
Ready to stop building from scratch and get to market faster? With AppLighter, you get a production-ready starter kit that handles all the foundational work, so you can focus on building the features that make your app unique. Build and ship mobile apps faster with Expo (React Native).
Related Articles
Mobile App Tech Stack: How to Choose the Best mobile app tech stack
Explore how to choose a mobile app tech stack that fits your goals. This concise guide outlines layers, trade-offs, and how to accelerate MVP development.

Mobile App Development for Startups Your Ultimate Guide
Master mobile app development for startups with our step-by-step guide. Learn to validate your idea, choose a tech stack, and launch your MVP fast.