A Developer's Guide to Linear Gradient React Native
Master linear gradient react native to build stunning UIs. This guide covers setup, styling, animation, and performance for Expo and bare RN.

To add a linear gradient in React Native, you'll need a specialized library. The two go-to options are expo-linear-gradient for Expo projects and react-native-linear-gradient if you're working with a bare React Native setup. These libraries give you a wrapper component that makes creating smooth color transitions for backgrounds, buttons, and other UI elements incredibly straightforward.
Why Gradients Are a Big Deal in Modern App UI
Linear gradients are so much more than just a stylistic choice. They're a core part of building a user interface that feels modern, engaging, and professional. In a world where an app's visual appeal can make or break user retention, a thoughtfully designed gradient can elevate a flat, static screen into something dynamic and polished. It adds a sense of depth that solid colors just can't match, helping to guide the user's eye exactly where you want it.
Take a look at the apps you use every day. That subtle blue-to-purple gradient on an Instagram story ring? The rich, dark gradients in Discord's interface? These aren't just random design flourishes. They have a purpose:
- Build a Strong Brand Identity: Gradients can help create a visual signature that makes your app instantly recognizable.
- Guide the User Experience: They make call-to-action buttons stand out, which can directly improve conversion rates.
- Create Visual Hierarchy: By drawing attention to specific areas, gradients tell users what's most important on the screen.
Gradients in the React Native World
As cross-platform development has matured, so has the demand for sophisticated UIs. The React Native ecosystem really took off after 2018 when libraries like react-native-linear-gradient became stable and widely adopted. Today, it boasts over 1.2 million weekly downloads, a clear sign of its importance.
This boom is driven by the efficiency React Native brings to the table. For instance, when Discord transitioned to React Native, they achieved an incredible 98% code reuse between iOS and Android. This allowed their team to build complex UIs with seamless gradients for features like dark mode, all without a performance hit. You can learn more about React Native's market impact to see just how big it's gotten.
For developers, this means that adding a linear gradient to a React Native app is no longer some complex, hacky workaround. It’s a standard, accessible technique for boosting an app's look and feel, backed by powerful engines like Hermes that ensure buttery-smooth rendering, even on lower-end devices.
Getting Your Project Ready for Gradients
Before you can start painting your UI with beautiful gradients, you need to get the right library installed. Your setup will depend entirely on your project's foundation: are you building with the managed Expo framework or a bare React Native project? Each path has its own go-to package.
If you're in the Expo ecosystem, the choice is simple: expo-linear-gradient. It’s built and maintained by the Expo team, which means it integrates seamlessly with zero fuss.
For those of us working in a bare React Native environment, the community standard is react-native-linear-gradient. It's a powerful and flexible library, though it does require a tiny bit more legwork to connect the native pieces, especially on the iOS side.
Gradients aren't just for looks; they're a powerful tool for creating depth, guiding the user's eye, and reinforcing your app's brand identity. Choosing the right moments to use them can elevate a good design to a great one.
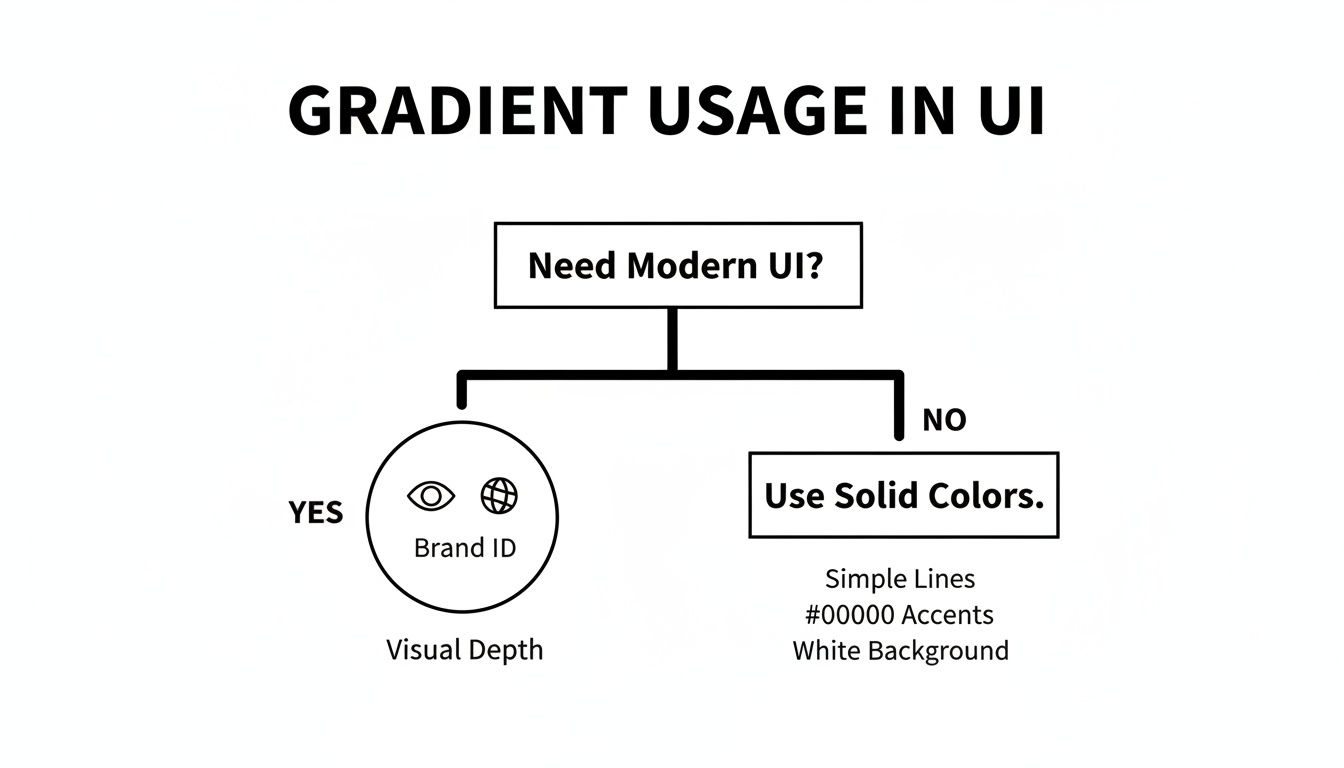 Flowchart guiding gradient usage in UI design, differentiating between modern UI needs and solid color aesthetics.
To make the choice crystal clear, let's break down the two main libraries and their setup process.
Expo vs Bare React Native Gradient Library Setup
Here’s a quick side-by-side look at the two libraries. While they achieve the same visual result, their installation and how they hook into your project are quite different.
| Feature | expo-linear-gradient | react-native-linear-gradient |
|---|---|---|
| Best For | Projects built with the managed Expo framework. | Bare React Native projects or those ejected from Expo. |
| Installation Command | npx expo install expo-linear-gradient | npm install react-native-linear-gradient or yarn add react-native-linear-gradient |
| Native Linking | None required. Handled automatically by the Expo CLI. | Required for iOS. You must run pod install in the ios directory. |
| Ease of Setup | Extremely simple. One command and you're done. | Simple, but requires an extra manual step for iOS that's easy to forget. |
| Compatibility | Version is tied to your Expo SDK version, ensuring compatibility. | You manage the version yourself; must be compatible with your React Native version. |
Essentially, if you're using Expo, stick with its native library to avoid headaches. For bare projects, react-native-linear-gradient is your trusted workhorse.
Installing with Expo Go
Getting expo-linear-gradient up and running is as smooth as you'd expect from Expo. Since it's a first-party package, you just need one command.
Pop open your terminal in your project's root directory and run this:
npx expo install expo-linear-gradient
It's really important to use expo install instead of npm or yarn. This special command handles versioning for you, picking the exact library version that matches your project's Expo SDK. This little detail saves you from a world of pain caused by version mismatches.
Once that's done, you're all set. No native builds, no config files—just import it and start creating.
Configuration for Bare React Native
For bare React Native projects, the process is just a little more hands-on. You'll start by adding the package with your favorite package manager.
npm install react-native-linear-gradient
Or, if you prefer Yarn:
yarn add react-native-linear-gradient
Now for the crucial part: linking the native code. For iOS, you need to sync the new native dependency with your Xcode project using CocoaPods.
Just navigate into your ios folder and run pod install:
cd ios && pod install && cd ..
Pro Tip: Forgetting to run
pod installis the #1 reasonreact-native-linear-gradientdoesn't work on iOS. If you see a solid color instead of a gradient, or nothing at all, this command should be your first troubleshooting step.Modern versions of React Native are pretty good at auto-linking for Android, but after any native change, a full project rebuild is always a safe bet.
Crafting Your First Linear Gradient
Okay, with the setup out of the way, it's time for the fun part: creating your first linear gradient in React Native. We'll start simple with a basic, two-color vertical blend to get a feel for the core concepts. Once you've got that down, we can move on to more complex and eye-catching designs.
 Close-up of an iPhone displaying an app to create color gradients, next to a laptop.
Let's get right into the code. The great thing is, whether you're using expo-linear-gradient or react-native-linear-gradient, the component and its props are practically identical. The most crucial prop you'll always use is colors, which simply takes an array of color strings.
Here’s a simple functional component that renders a vertical gradient, transitioning from a deep blue to a vibrant purple. This is a perfect starting point for app backgrounds or stylish container elements.
import React from 'react'; import { StyleSheet, View } from 'react-native'; import { LinearGradient } from 'expo-linear-gradient'; // or 'react-native-linear-gradient'
const BasicVerticalGradient = () => { return ( <LinearGradient // This array defines the colors from top to bottom colors={['#4c669f', '#3b5998', '#192f6a']} style={styles.container} > {/* You can place other components like Text or Buttons here */} ); };
const styles = StyleSheet.create({ container: { flex: 1, width: '100%', alignItems: 'center', justifyContent: 'center', }, });
export default BasicVerticalGradient;
Controlling the Gradient Direction
By default, the gradient always flows from top to bottom. To change that, you’ll need to use the start and end props. Each prop takes an object with x and y coordinates, which tells the gradient where to begin and end its color transition.
The coordinate system can feel a little abstract at first, but it's pretty straightforward. Just picture a box around your component:
- (x: 0, y: 0) is the top-left corner.
- (x: 1, y: 1) is the bottom-right corner.
- (x: 0.5, y: 0) is the top-center.
- (x: 0, y: 0.5) is the left-center.
So, to make a horizontal gradient that flows from left to right, you just set the start point to the left edge and the end point to the right edge.
<LinearGradient colors={['#FF5733', '#C70039']} start={{ x: 0, y: 0.5 }} end={{ x: 1, y: 0.5 }} style={styles.horizontal} />
Want a diagonal gradient? Just point it from corner to corner, like from top-left to bottom-right.
<LinearGradient colors={['#00C9FF', '#92FE9D']} start={{ x: 0, y: 0 }} end={{ x: 1, y: 1 }} style={styles.diagonal} />
The key is to remember that these coordinates are relative to the component's own dimensions. An
xvalue of0.5will always be the horizontal center, regardless of the component's actual width in pixels. This makes your gradients responsive by default.
Fine-Tuning Color Stops with Locations
Sometimes you need more precision over where the color transitions happen. This is where the locations prop comes in—it gives you pinpoint control. It’s an array of numbers between 0 and 1 that lines up perfectly with your colors array. Each number specifies the exact position where its corresponding color should be at full strength.
This is super useful for creating sharp, defined lines or for making one color dominate a much larger portion of the gradient.
Let's look at a more practical example: a "premium feature" button with a nice gold-to-yellow gradient. We can use locations to make the transition feel smooth and concentrated in just the right places.
import React from 'react'; import { StyleSheet, Text, TouchableOpacity } from 'react-native'; import { LinearGradient } from 'expo-linear-gradient';
const PremiumButton = () => {
return (
const styles = StyleSheet.create({ buttonContainer: { width: 250, height: 50, borderRadius: 25, shadowColor: '#000', shadowOffset: { width: 0, height: 2 }, shadowOpacity: 0.25, shadowRadius: 3.84, elevation: 5, }, gradient: { flex: 1, justifyContent: 'center', alignItems: 'center', borderRadius: 25, }, buttonText: { color: '#ffffff', fontSize: 18, fontWeight: 'bold', }, });
export default PremiumButton;
In this button, #FFD700 starts at the very beginning (0), #FFA500 hits its peak right in the middle (0.5), and #FF8C00 takes over toward the end (0.8). This creates a rich, metallic feel that's perfect for a call-to-action. You can drop this component right into any project, including one built with the AppLighter starter kit, to add a polished touch instantly.
Advanced Techniques with Animated and Dynamic Gradients
This is where the real fun begins: bringing gradients to life. Static gradients are great, but animating them is what separates a good UI from a truly memorable one. A dynamic, animated linear gradient in React Native can transform your interface from a static screen into a living, breathing experience. Think shimmering buttons, subtle background shifts, or elegant loading states that make your app feel polished and incredibly responsive.
 An iMac on a wooden desk displays design software featuring colorful animated gradients and a keyboard.
The secret sauce is combining your gradient component with React Native’s own Animated API. The basic idea is to wrap your <LinearGradient> inside an <Animated.View> component. From there, you can animate its properties—like its position using transform—over time. This unlocks the ability to create motion that responds to user input, timers, or any other state change in your app.
Building a Shimmer Loading Effect
One of my favorite uses for animated gradients is the "shimmer" effect you see on skeleton loaders. Instead of a generic spinner, you can present a placeholder UI that pulses with a gentle, sweeping light. It’s a fantastic way to reassure users that content is on its way while perfectly maintaining the page's structure.
The trick is to create a very wide gradient and then slide it horizontally across a masked view. The mask itself is shaped like your placeholder content—think boxes for text and a circle for an avatar—and the moving gradient beneath provides that signature shimmer.
Let’s walk through how to build a simple version.
- Set Up the Mask: First, you’ll need a masking library. I recommend
@react-native-masked-view/masked-view. ThemaskElementwill be a basic<View>that defines the shape where your gradient will shine through. - Create the Animated Gradient: Inside the
MaskedView, you'll place an<Animated.View>containing your<LinearGradient>. The key is to make this gradient much wider than the screen; starting with three times the device width usually works well. - Animate the Position: Now, you'll use the
AnimatedAPI to create a looping animation. AnAnimated.Valuewill drive thetranslateXtransform, continuously moving the wide gradient from left to right across the masked placeholder.
Here’s a quick code snippet to show you what this looks like in practice. This technique is also super performant because we’re only animating the transform property, which gets handed off to the native thread.
import React, { useRef, useEffect } from 'react'; import { Animated, View, StyleSheet, useWindowDimensions } from 'react-native'; import MaskedView from '@react-native-masked-view/masked-view'; import { LinearGradient } from 'expo-linear-gradient';
const ShimmerPlaceholder = ({ children }) => { const shimmerAnimation = useRef(new Animated.Value(0)).current; const { width } = useWindowDimensions();
useEffect(() => { Animated.loop( Animated.timing(shimmerAnimation, { toValue: 1, duration: 1500, useNativeDriver: true, // Crucial for performance! }) ).start(); }, [shimmerAnimation]);
const translateX = shimmerAnimation.interpolate({ inputRange: [0, 1], outputRange: [-width, width], });
return (
const styles = StyleSheet.create({ background: { ...StyleSheet.absoluteFillObject, }, });
Performance Matters: I can't stress this enough: always set
useNativeDriver: truein your animations whenever you can. This moves the animation logic off the JavaScript thread and onto the native UI thread, which is far more efficient. The result is a silky-smooth, jank-free experience, even on older phones.
From here, you can easily tweak the colors array or the animation duration to customize the shimmer's look and feel to perfectly match your app's brand.
Nailing Performance and Cross-Platform Consistency
A great-looking linear gradient in React Native is fantastic, but not if it kills your app's performance. Smoothness is everything, and even though modern gradient libraries are pretty well-optimized, there are still a few common traps that can introduce jank or slowdowns, especially on less powerful devices. The real goal is to use gradients to elevate your UI without them becoming a performance bottleneck.
The most common mistake I see is putting complex, multi-stop gradients inside components that re-render all the time—think items in a FlatList. Remember, each gradient is a native view that has to be drawn. When you have dozens of them on screen, the work starts to pile up, and you'll see dropped frames when the user scrolls. For lists, it's often better to stick to simpler gradients or even use a pre-rendered image asset for more intricate patterns.
Keeping Your UI Silky Smooth
So, how do you keep things running smoothly? Simplicity is your best friend here. A straightforward two or three-color gradient will almost always outperform one with ten different stops messing with the locations prop.
Also, be careful when you apply gradients to components that are constantly changing size or position. Every time that happens, the gradient's bounds have to be recalculated, and that can put a strain on the UI thread.
Here are a few practical tips I've picked up:
- Go Easy on List Items: If you absolutely need a gradient in a list, keep it simple. Also, make sure to wrap your list item component in
React.memoto cut down on needless re-renders. - Animate Smart, Not Hard: Instead of animating the
colorsarray (which isn't hardware-accelerated and can be sluggish), try animating other properties likeopacityor atransform. - Lock in Dimensions: When you can, apply gradients to views with a fixed
widthandheight. This sidesteps the performance hit that comes from the app constantly figuring out the layout.
Here's a solid rule of thumb: fire up a profiler like Flipper and keep an eye on your app's performance. If you're seeing stutters during scrolling or screen transitions, try disabling your most complex gradients. You'd be surprised how often simplifying just one heavily-used gradient can solve the problem.
Tackling Platform Differences and Accessibility
Even though React Native lets you write once and run anywhere, you'll still run into subtle rendering differences between iOS and Android. The graphics engine on Android (Skia) might handle things like color dithering a bit differently than Apple's Core Graphics. You should always, always test your gradients on actual iOS and Android devices to catch any weird color banding or smoothness issues before your users do.
Beyond how it looks, we have to talk about accessibility. It's not optional. Text slapped on top of a gradient can be a nightmare for readability, easily failing contrast ratio standards for users with visual impairments. The contrast can shift dramatically from one end of the gradient to the other.
To get this right, grab an online contrast checker and test your text color against the lightest and darkest parts of your gradient. You need to make sure you're hitting at least a WCAG AA ratio of 4.5:1 across the entire area the text covers. This simple check ensures your design is not only beautiful but usable for everyone.
Your Linear Gradient Questions Answered
When you're working with a linear gradient in React Native, you’re going to hit a few common roadblocks. I've been there. This section is your quick reference guide, packed with practical answers to the most frequent issues developers run into.
Let's get these problems sorted so you can get back to building.
Why Is My Gradient a Solid Color or Invisible?
This is, hands down, the most common snag. It almost always comes down to two things: a botched installation or a layout problem.
If you're using react-native-linear-gradient in a bare project, the first thing to double-check is that you actually ran pod install in your ios directory after adding the package. It's a surprisingly easy step to forget in the heat of coding.
The second culprit is usually size. The <LinearGradient> component has no idea how big it's supposed to be on its own; it has no inherent dimensions. You have to tell it.
- Set explicit dimensions: Give it a specific
heightandwidthin its style object. - Lean on Flexbox: If your gradient is inside a flex container, the simplest fix is to give the gradient component
flex: 1. This commands it to fill all the available space defined by its parent.
Finally, do a quick sanity check on your colors prop. It absolutely must be an array with at least two valid color strings, like ['#FF0000', 'blue']. A simple typo in a hex code will stop it from rendering correctly.
Can I Create a Radial Gradient?
Short answer: no, not with these libraries.
Both expo-linear-gradient and react-native-linear-gradient are built specifically for one job—linear color transitions. They don't support radial or circular gradients out of the box.
To get that radial effect, you'll need to reach for a more powerful graphics tool. Your best options are libraries like
react-native-svgor the super-performant@shopify/react-native-skia. These give you a canvas to draw custom shapes and apply complex fills, including radial gradients.For simpler use cases, don't over-engineer it. Just using a pre-rendered image asset is a perfectly valid and often more performant solution.
How Do I Apply a Gradient to Text?
You can't just apply a gradient to the color style on a <Text> component. It just doesn't work that way. The standard professional technique is to use masking.
The go-to library for this is @react-native-masked-view/masked-view.
The concept is pretty cool: you render your <LinearGradient> component as usual, but then you use it as a mask for your <Text> element. This effectively "clips" the gradient into the shape of your text, creating that slick gradient text effect. The setup involves nesting the Text inside the MaskedView and then passing your LinearGradient to the maskElement prop.
Ready to skip the setup and start building production-ready apps immediately? AppLighter is a premium starter kit for Expo (React Native) with authentication, state management, and an edge-ready API layer already configured. Build faster at AppLighter.com.
Related Articles

Explore charts react native: Build Interactive Charts in Mobile Apps
Practical guide to charts react native: choose libraries, connect data with Supabase, and optimize performance for Expo apps.

A Practical Guide to AI User Interface Design
Discover the core principles of AI user interface design. This guide for developers covers key models, ethical practices, and real-world UI/UX strategies.

React Native Maps Guide 2026: Google Maps + Best Libraries
A practical guide to integrating React Native Google Maps in Expo. Learn to set up API keys, add custom markers, optimize performance, and ship your app.