How to Monetize Apps A React Native Developer's Guide
Learn how to monetize apps using React Native and Expo. Our guide covers proven revenue models, in-app purchases, and backend setup for iOS and Android.
Alright, let's get into the nitty-gritty of making money with your app. This is often where the dream meets reality, and picking the right path from the start can make all the difference. You've got four main roads you can go down: in-app advertising, subscriptions, freemium models, and good old-fashioned one-time purchases.
The best choice isn’t one-size-fits-all; it really hinges on what your app does and who you're building it for. The goal is always the same, though: build a healthy revenue stream without annoying your users into leaving.
Choosing Your App Monetization Strategy
 Monetization strategy displayed on a laptop screen with a coffee cup and notebook on a wooden table.
Before you even think about coding a paywall or integrating an ad SDK, the most crucial decision you'll make is how your app will actually make money. This choice dictates so much—from your app's architecture to the user's journey. If you're using a starter kit like AppLighter, thinking about this from day one is a huge advantage, as you can build the necessary hooks and infrastructure right into your foundation.
The mobile app scene isn't what it used to be. The "app gold rush" days, where you could launch an app and get a ton of downloads with minimal effort, are long gone. Today, users are spending more money than ever, but they're doing it within a much smaller circle of apps they already know and trust. This shift means a well-thought-out monetization plan is no longer optional—it's essential.
Understanding the Dominant Models
Let's break down the main ways to turn your app into a business. Each has its own rhythm and is a better fit for certain types of apps.
To help you see the differences at a glance, here’s a quick comparison of the most common app monetization strategies. This should help you start thinking about the best fit for your own project.
Comparing App Monetization Models
| Model | Best For | Pros | Cons |
|---|---|---|---|
| In-App Advertising | High-volume, casual apps (games, utilities) where users expect free access. | Low barrier to entry for users. Can generate significant revenue at scale. | Can be intrusive and hurt the user experience. Requires a large user base to be profitable. |
| Subscriptions | Apps with ongoing value or regularly updated content (media, fitness, productivity). | Provides predictable, recurring revenue (MRR). Fosters user loyalty. | High user expectations for new content/features. Churn can be a major challenge. |
| Freemium | Apps where users can experience core value before paying (productivity, games, services). | Great for user acquisition. Users can "try before they buy," leading to qualified buyers. | Balancing free vs. paid features is tricky. A small percentage of users will convert. |
| One-Time Purchase | Niche, high-value utility apps or premium games with a clear, finite value proposition. | Simple and transparent for the user. Revenue is received upfront. | High barrier to entry. No recurring revenue. Difficult to get users to pay before trying. |
Choosing a model from this table is a great starting point, but remember, the real magic often happens when you start combining them.
The most resilient apps rarely stick to just one model. In fact, over 60% of top-grossing applications now use a hybrid approach, mixing subscriptions with consumable in-app purchases or offering an ad-supported free version alongside a premium, ad-free subscription.
Matching Your App to a Model
So, how do you pick the right path for your app? It all comes down to your core value proposition and what your target audience has come to expect in your category.
Think about it this way: if you're building a meditation app that adds new guided sessions every week, a subscription model just makes sense. Your users get that they're paying for continuous access to fresh content. But if your app is a simple photo filter tool, a freemium model where people can buy premium filter packs is a much better fit. They can play with the basics for free and only pull out their wallet for the extras they really want.
The market trends are also telling a clear story. The advertising sector is still a beast, pulling in around $307 billion in 2023 alone, and it's projected to keep climbing. For those of us building with Expo, this is a key insight. While subscriptions get all the glory on the top-grossing charts, a hybrid model often gives you the best of both worlds. You can dive deeper into these trends by reading up on the latest research on the mobile app economy.
Ultimately, diversifying your revenue has proven to be a much more effective strategy than trying to go all-in on a single, crowded monetization category.
Integrating In-App Ads with Expo and AdMob
 A hand holds a smartphone displaying a video app, with a laptop in the background, illustrating ad integration.
For a lot of app founders, ads are the quickest way to start generating revenue. It's a classic model for a reason: you get to keep your app free for everyone, which can be a huge advantage for attracting a massive user base right out of the gate. And if you're building with a framework like Expo, plugging into sophisticated ad networks is surprisingly painless.
We're going to walk through a production-ready setup using the undisputed giant of mobile ads: Google AdMob. The goal here isn't just to slap some ads on the screen. It's about doing it thoughtfully, so you don't wreck the user experience you've poured so much effort into creating.
Getting Started with Google AdMob
Before you touch a single line of code, your first stop is the AdMob dashboard. This is your command center for registering your app, creating what are called "ad units," and seeing how everything is performing. Think of an ad unit as a specific slot in your app where an ad will show up.
AdMob offers a bunch of different ad types, but for most apps, three formats strike the best balance between making money and keeping users happy.
- Banner Ads: These are the familiar little rectangles you see stuck to the top or bottom of the screen. They’re always there but are generally less distracting.
- Interstitial Ads: Full-screen ads that pop up at natural breaks in the user flow. Think between levels in a game or after you finish a key task.
- Rewarded Ads: These are opt-in video ads. A user chooses to watch one in exchange for something valuable in your app, like extra credits or unlocking a feature.
When you set these up in your AdMob account, you'll get unique Ad Unit IDs for each one. Keep these safe—they are the keys that connect your app's ad slots to Google's ad inventory.
Setting Up the Expo AdMob SDK
With your Ad Unit IDs in hand, it's time to pull this functionality into your Expo project. The official expo-ads-admob package is a lifesaver here, as it handles most of the tricky native configuration for you. If you're using a starter kit like AppLighter, a lot of this groundwork is already laid, letting you jump straight to the implementation logic.
The very first thing you need to do is initialize the AdMob SDK when your app boots up. This only needs to happen once, so your main App.js file is the perfect spot. It ensures the SDK is primed and ready to go when you need to call for an ad. You'll simply use the setAppIDAsync method and pass in your AdMob App ID from the dashboard.
Choosing an ad-based model isn't just a whim; it's a strategy backed by serious market data. As of March 2024, in-app advertising was the number one monetization method for app publishers worldwide, pulling in almost $307 billion in revenue in 2023. This is especially potent for cross-platform apps built with Expo, allowing you to reach the widest possible audience while building a real income stream. You can dig into the numbers in this comprehensive overview of mobile app monetization.
Implementing Different Ad Formats
Once you're initialized, showing each ad type requires a slightly different approach.
For a banner ad, it's as simple as importing the AdMobBanner component and dropping it into your JSX. Just pass your Ad Unit ID as a prop, and you're good to go.
Interstitial and rewarded ads are a bit more dynamic. The best practice is to request the ad ahead of time, let it load in the background, and then display it when the user hits a specific trigger. This pre-loading is absolutely crucial. Nobody wants to sit and stare at a loading spinner just to see an ad.
Let's take a rewarded ad as an example:
- First, you set the Ad Unit ID with
AdMobRewarded.setAdUnitID. - Next, you call
AdMobRewarded.requestAdAsyncto start fetching the ad. - You'll listen for the
rewardedVideoUserDidEarnRewardevent so you know the exact moment to give the user their prize. - Finally, when the user taps the button to watch the ad, you call
AdMobRewarded.showAdAsync.
Placement is everything. An interstitial that pops up while a user is typing is infuriating. But one that appears after they've successfully saved their progress feels like a natural pause. Likewise, rewarded ads are most effective when the reward is genuinely helpful—something that enhances their experience, not just a gatekeeper blocking core features. Finding that balance is the real secret to figuring out how to monetize apps without driving your users away.
Using RevenueCat and Expo to Build Subscriptions
While ads can be a solid revenue stream, subscriptions are often the real prize for app founders. Nothing beats predictable, recurring revenue. But if you've ever looked into building a subscription system from the ground up, you know it's a beast. You're suddenly dealing with different store APIs, renewal logic, entitlement tracking, and server-side receipt validation. It’s a full-time job in itself.
This is exactly why a service like RevenueCat is a non-negotiable part of my mobile stack.
RevenueCat sits between your app and the App Store/Play Store, giving you one clean, simple API to manage everything. It saves you hundreds of hours of mind-numbing development work, letting you focus on what actually matters: building the premium features people will pay for.
Here’s a look at the main dashboard. It turns a firehose of raw data into something you can actually use to make decisions.
Seeing your MRR and active subscriber count at a glance is invaluable. Without a tool like this, getting these numbers is a painful, manual process.
Getting a Handle on RevenueCat’s Core Ideas
Before we jump into the code, you need to understand how RevenueCat thinks about subscriptions. Their entire system is built on a few key concepts that make managing products across iOS and Android feel almost effortless.
- Products: These are the actual items you set up in App Store Connect and the Google Play Console. Think
monthly_subscription_tier_1orannual_pro_plan. - Entitlements: This is the secret sauce. An entitlement represents access to a feature, like "Premium" or "Pro." You link one or more products to an entitlement. In your code, you just check if a user has the "Premium" entitlement—you don't have to worry about whether they bought the monthly iOS plan or the annual Android one.
- Offerings: An offering is simply a collection of products you want to show on your paywall at any given time. This brilliant setup lets you A/B test different prices and packages remotely without ever needing to submit a new version of your app.
Grasping this hierarchy is crucial. You create the raw products in the app stores, but you control the entire user experience through Entitlements and Offerings right from the RevenueCat dashboard.
Integrating the SDK into Your Expo App
Getting RevenueCat running in a React Native project, especially one built on a solid starter like AppLighter, is surprisingly painless. The official react-native-purchases SDK does all the heavy lifting with the native code for you.
The first thing you’ll do is configure the SDK when your app boots up. This is a one-and-done setup that usually goes right in your main App.js file, where you'll initialize it with your public API key from your RevenueCat project.
As soon as it's initialized, the SDK automatically talks to the app stores, pulling down the latest product info and checking the current user’s subscription status.
Expert Tip: The real power here is abstracting away store-specific logic. By checking for an entitlement like
premiuminstead of a product ID likemonthly_ios_v1, you gain incredible flexibility. You can add new plans, change prices, or run a holiday promotion on your paywall without ever touching your app's core access control code. It's a huge win.
Building Your Paywall and Handling Purchases
With the SDK configured, you can get to the fun part: building the paywall experience for your users. The whole flow really boils down to three key actions: fetching your products, starting a purchase, and checking if a subscription is active.
Fetching Your Offerings
To actually show the subscription options on your paywall, you'll call Purchases.getOfferings(). This handy function grabs the current "offering" you’ve set up in your RevenueCat dashboard. The response contains everything you need to build your UI, including all the available packages (like monthly and yearly options), with correctly localized pricing and trial period details already baked in.
Kicking Off a Purchase
When a user taps that "Subscribe" button, you’ll call Purchases.purchasePackage(), passing it the specific package they selected. From there, the SDK takes over. It presents the official, native purchase screen from iOS or Android, handling the entire transaction securely. You don't have to touch any of the gnarly, platform-specific payment code.
Checking Who Gets Access
This is the check you'll use constantly throughout your app. To figure out if a user should see your premium features, you'll grab their CustomerInfo object with a quick call to Purchases.getCustomerInfo().
From there, you just check if your "premium" entitlement is active in the entitlements.active dictionary. That one line of code becomes the single source of truth for unlocking paid content across your entire application. This is how you monetize apps effectively without getting lost in the weeds of platform-specific APIs.
Securing Purchases with a Serverless Backend
It’s an awesome feeling to see those first purchases roll in. But if you’re only checking for a successful payment on the user's device, you’re leaving a massive security hole wide open.
Think about it: what’s stopping a clever user from tricking your app into thinking a purchase went through? This is precisely why a secure backend isn't just a "nice-to-have"—it's a non-negotiable for any serious app business.
Your app should act as a messenger, nothing more. The real authority, the single source of truth for who has paid and who hasn't, has to live on a server you control. This is the only way to prevent fraud and keep your user data accurate.
The whole process breaks down into a few key phases: setting up your backend, integrating the necessary services, and then connecting it to your paywall.
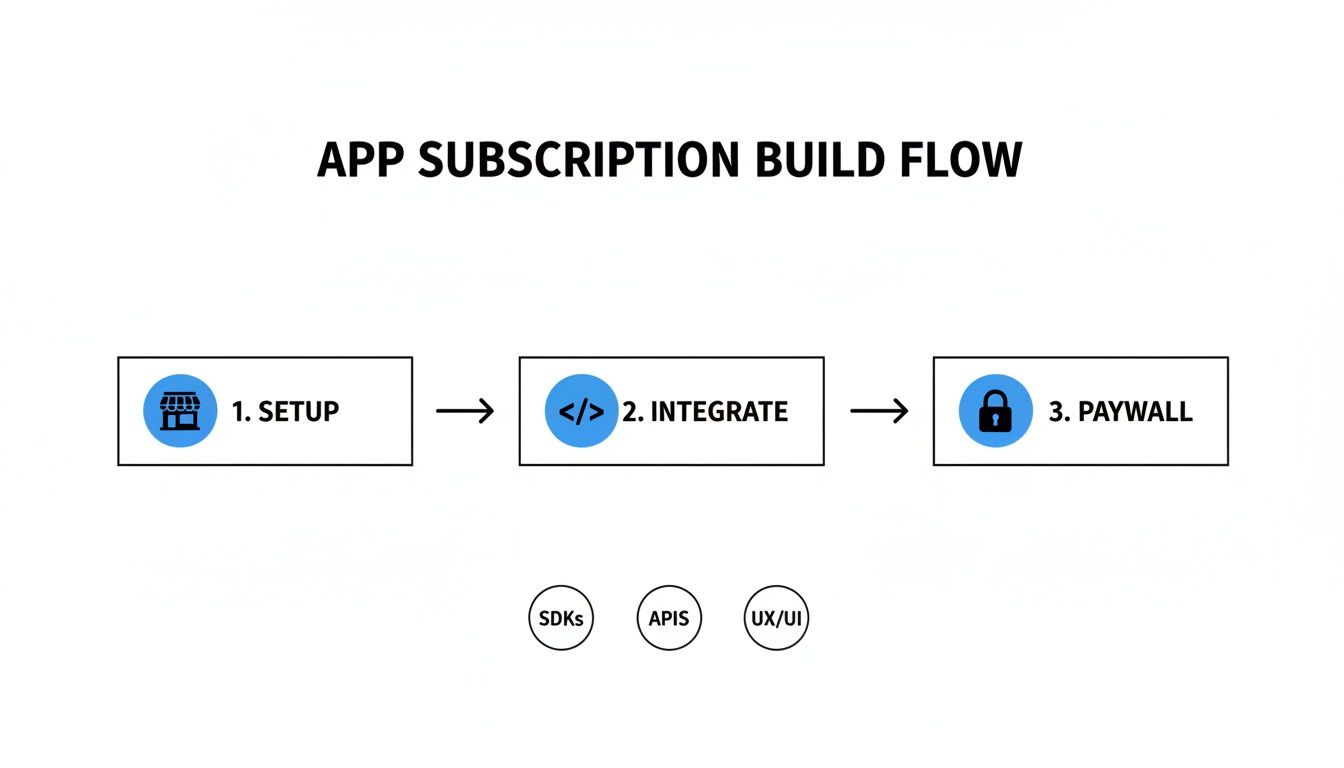 Flowchart showing the app subscription build process: Setup, Integrate (SDKs, APIs, UX/UI), and Paywall.
As you can see, a successful subscription system is all about this secure, integrated flow. The paywall is just the final piece of a much larger puzzle.
Why Server-Side Validation is So Critical
When a user subscribes, the App Store or Google Play pings a service like RevenueCat. RevenueCat, in turn, can immediately fire off a webhook—an automated message—to an endpoint you own. This event-driven model is infinitely more reliable than waiting for your app to phone home about a purchase.
By setting up a simple serverless function to catch these webhooks, you create a rock-solid system. It updates a user's status in your database in real-time, straight from the payment source. There are a few big wins with this approach:
- Security: It shuts the door on users who try to tamper with your app's code to get free premium access.
- Reliability: A user’s subscription status gets updated even if they close the app a second after the purchase confirmation.
- Data Accuracy: Your own database becomes the definitive record of who has access, which is invaluable for analytics and customer support down the line.
Building Your Endpoint with Supabase Edge Functions
We’ll use Supabase Edge Functions for this job. They're incredibly easy to deploy, they scale automatically, and they play nicely with a Supabase database. If you're starting with a kit like AppLighter, a lot of this backend logic is already stubbed out for you, which makes things even quicker.
The heart of our function is a listener for incoming POST requests from RevenueCat. Every single request they send includes a special signature in its header. Our first, and most important, task is to verify that signature using a secret key they give you.
This signature check is everything. Seriously. If you skip this step, anyone on the internet could send a fake request to your endpoint and grant themselves—or anyone else—a free premium subscription. It’s the digital equivalent of a bouncer checking IDs at the door.
Once you’ve confirmed the signature is legit, you can trust the data in the request. The payload contains a goldmine of info about the event, like the user's ID and exactly which entitlement was granted or revoked.
Processing Webhook Events
With a validated request in hand, the next job is to parse the event data and update your database. The RevenueCat webhook tells you precisely what just happened with a user's subscription.
You’ll want to build logic to handle a few key event types:
- INITIAL_PURCHASE: This means a user subscribed for the very first time. You’ll find their record in your
userstable, mark their subscription as active, and maybe set an expiration date. - RENEWAL: Great news—their subscription just successfully renewed. All you need to do is push their expiration date forward in your database.
- CANCELLATION: This could mean the user actively canceled or their payment failed. You'll update their record to show that their premium access will end when the current billing cycle is over.
By listening for these events, your backend keeps a perfect, real-time mirror of every user's subscription status. Now, when a user opens your app, you don’t have to ask the App Store for their status; you just check your own database. This creates a secure, closed-loop system that’s absolutely essential for building a sustainable business.
Optimizing Your Pricing and Analyzing Performance
Getting your monetization live is a huge step, but honestly, that's just the starting line. The real work—the stuff that turns a good app into a great business—starts now. This is where you roll up your sleeves and get into pricing experiments and performance analytics.
It's tempting to just set a price and hope for the best. That’s a classic mistake. The price that feels right in your gut might be completely wrong for your audience. The only way to know for sure is to test relentlessly and let the data be your guide.
Running Smart Pricing Experiments
Pricing should never be a guessing game. You need a systematic way to test different price points and plan structures to find that sweet spot that maximizes your revenue without alienating users. This is exactly what A/B testing, or what many platforms call "experiments," is for.
Tools like RevenueCat Experiments were practically built for this. Using their "Offerings" system, you can show different prices to different groups of users on the fly, without having to push a new build to the app store.
Think about a real-world scenario:
- Control Group: They see your standard plan at $9.99/month.
- Variant A: This group sees the exact same plan, but you test a lower price point, say $7.99/month.
- Variant B: Here, you show them the standard monthly plan alongside a new annual option for $79.99, highlighting the discount.
You just let the experiment run until you have enough data to make a call. You might discover the lower price converts way more people, but the annual plan brings in a much higher average revenue per user. These are the kinds of insights that truly shape a business.
The Metrics That Truly Matter
Once the money starts coming in, it’s easy to get overwhelmed by all the data. Vanity metrics like "total downloads" feel good, but they don't pay the server bills. To really understand the health of your app as a business, you have to zero in on a handful of key performance indicators (KPIs).
The most successful app developers I know are obsessed with three core metrics: Monthly Recurring Revenue (MRR), Churn Rate, and Lifetime Value (LTV). These numbers tell the true story of your app's financial health and long-term viability.
Let’s quickly touch on why each one is so critical:
- Monthly Recurring Revenue (MRR): This is your predictable monthly income from active subscriptions. It's the lifeblood of any subscription business, giving you stability and a clear signal of your growth trajectory.
- Churn Rate: Simply put, this is the percentage of subscribers who cancel in a given period. A high churn rate is a massive red flag. It screams that something is off—your pricing, your product's value, or the user experience.
- Lifetime Value (LTV): This metric estimates the total revenue a single customer will generate before they leave for good. When your LTV is significantly higher than your customer acquisition cost (CAC), you've got a sustainable business on your hands.
Finding and Fixing Conversion Bottlenecks
Your analytics are more than just a report card; they're a roadmap showing you exactly where your monetization funnel is leaking. If you see thousands of users hitting your paywall but only a handful starting a trial, you’ve just found a major conversion bottleneck.
This is your cue to start iterating. Is your value proposition weak? Is the call-to-action button buried or unclear? Is the price just too steep for what you're offering? Each of these questions is a hypothesis you can test.
For instance, you could run a simple A/B test on your paywall headline. Changing "Unlock Pro" to "Start Your 7-Day Free Trial" might be all it takes to double your trial sign-ups. This continuous cycle—analyzing data, forming a hypothesis, and testing a solution—is the heart of optimizing how you monetize apps. It shifts monetization from a "set it and forget it" task to a dynamic, ongoing process of improvement.
Your Essential Pre-Launch Monetization Checklist
 A desk flat lay with a laptop, smartphone, tablet, and a 'PRE-LAUNCH CHECKLIST' clipboard.
You’ve built the features, secured the backend, and the UI is looking sharp. The finish line is in sight. But between you and your first dollar is one final, critical stage: a meticulous quality assurance process.
Trust me, you don't want to skip this. Rushing now is a sure-fire way to invite user frustration, get hit with negative reviews, and lose revenue right out of the gate. Think of this checklist as your last line of defense, a practical rundown to make your monetization system bulletproof before real users ever see it.
Verifying Store Configurations
Before you even think about tapping "buy" in a test build, your setup inside App Store Connect and Google Play Console has to be flawless. One small mistake here can bring the whole system down.
- Product IDs Must Match Exactly: Go back and double-check that the product identifiers in your code—and in RevenueCat, if you're using it—are a perfect character-for-character match with what’s in the stores. A single typo will make your products invisible.
- Agreements and Banking Info: This is a classic "gotcha." Make sure all the necessary financial agreements are signed and your banking information is current in both consoles. Outdated info can block all transactions.
- Sandbox Testers Are Ready: Have you set up sandbox tester accounts for both iOS and Android? You absolutely need these. They are the only way to simulate purchases and test the entire flow without spending real money.
The single most overlooked pre-launch test is the cancellation and refund flow. Use a sandbox account to simulate a user canceling their subscription. Does your backend correctly revoke their access? Does the app's UI update properly? Catching this now prevents ex-subscribers from getting a free ride on your dime.
Testing the Purchase Flow End-to-End
Alright, now it’s time to put on your user hat and try to break things. The goal here is to run through every possible scenario, from the perfect "happy path" purchase to all the weird edge cases where things might go wrong.
Critical User Scenarios to Test
Running through a gauntlet of user actions is the only way to find bugs before your customers do. This phase ensures your app handles the good, the bad, and the ugly with grace.
- The First-Time Purchase: Go through the complete flow for a brand-new user. Subscribe to a plan. Does the native payment sheet pop up correctly? Is premium access granted instantly?
- The Cancellation: Grab a sandbox account, subscribe, and then immediately dive into the device's system settings to cancel the subscription. Check that your app correctly reflects this change and revokes access at the end of the "billing period."
- The Subscription Restore: Imagine a user gets a new phone. "Reinstall" the app, log in, and hit your "Restore Purchases" button. Does it re-apply their premium access seamlessly without asking them to pay again? It has to.
- The Billing Error: What happens when a payment fails? Both platforms let you test this in their sandbox environments. Your app needs to show a clear, helpful error message and guide the user to fix their payment info, not just crash or hang.
Finally, the moment of truth. Are your backend webhooks firing for every single one of these events? Dive into your Supabase function logs. You should see INITIAL_PURCHASE, RENEWAL, and CANCELLATION events hitting your server and being processed correctly. This backend validation is non-negotiable for keeping an accurate and secure record of every subscriber.
Essential Pre-Launch QA Checklist
To make sure nothing slips through the cracks, use this table to track your progress. It covers the most critical checkpoints before you can confidently hit the launch button.
| Category | Check Item | Status (Not Started, In Progress, Complete) |
|---|---|---|
| Store Setup | Product IDs match across app, backend, and store listings. | |
| Store Setup | Banking and tax agreements are signed and up-to-date. | |
| Store Setup | Sandbox tester accounts are created for both iOS and Android. | |
| Purchase Flow | A new user can successfully purchase a subscription. | |
| Purchase Flow | The "Restore Purchases" button correctly re-applies access. | |
| Error Handling | The app gracefully handles a failed payment attempt. | |
| Subscription Logic | Canceling a subscription revokes access at the end of the term. | |
| Backend Validation | Webhooks for purchase, renewal, and cancellation are received. | |
| UI/UX | The paywall clearly displays all required pricing information. | |
| UI/UX | Premium features are unlocked immediately after a purchase. |
Going through this checklist methodically will save you countless headaches and support emails down the road. It ensures your revenue engine is running smoothly from day one.
Ready to build your app's monetization system without the headache? AppLighter provides a production-ready starter-kit for Expo and React Native, with pre-configured authentication, subscriptions, and a secure backend, so you can launch faster. Get started at https://www.applighter.com.