Expo React Native Tutorial: expo react native tutorial for production-ready apps
A practical expo react native tutorial to quickly build a production-ready app with setup, navigation, auth, and deployment.

So, you're ready to build a real-world app with React Native? You've come to the right place. This guide is your complete roadmap, taking you from a blank canvas to a polished, production-ready application using Expo. We'll tackle everything—initial setup, building screens, handling navigation, setting up authentication, and finally, shipping your app for the world to see.
Why Modern Developers Choose Expo for React Native
 A modern workspace with a laptop, smartphone, coffee cup, and mouse on a wooden desk with a 'Ship faster' banner.
Before we jump into the code, it’s worth understanding why Expo has become the go-to for so many of us in the React Native community. It's more than just a library; it's a whole platform designed to make building cross-platform apps a whole lot faster and less painful. The secret sauce is its managed workflow, which handles the messy, complicated parts of native iOS and Android development for you.
What does that actually mean? It means you can spend almost all your time writing JavaScript and React code. You won't have to constantly jump into Xcode or Android Studio to tweak native build settings, which is a massive time-saver. This approach has totally changed the game for dev teams, helping them ship features faster instead of getting bogged down in platform-specific configurations, a benefit highlighted in this analysis of developer trends.
Accelerating Your Development Workflow
The biggest win with Expo is pure speed. You can spin up a new project in minutes and have it running on your phone almost instantly with the Expo Go app. That immediate feedback loop is pure gold when you're deep in development.
But it goes way beyond just the initial setup. Expo makes the entire process smoother:
- Unified SDK: You get a trusted library of high-quality native modules right out of the box for things like the camera, push notifications, or authentication. No more hunting for and vetting third-party packages.
- Over-the-Air (OTA) Updates: Need to push a quick bug fix? You can send small updates directly to your users' devices, completely bypassing the slow app store review process.
- Cloud Build Services: When it's time to build your app for the App Store or Google Play, Expo Application Services (EAS) takes care of the entire complex build process in the cloud.
The real magic of Expo is that it lets you stay in the JavaScript ecosystem for 95% of your work. You avoid the context-switching and native tooling headaches that often slow down traditional React Native development.
From Beginner Tool to Production Powerhouse
For a while, Expo had a reputation as a tool for beginners or simple apps. That's just not true anymore. It has grown into a seriously robust platform that can handle large, complex applications used by millions.
With the introduction of development builds and config plugins, the old limitations are gone. You can now use any native React Native library you want, giving you the best of both worlds: a fast, simple developer experience with the power to drop down to the native layer whenever you need to.
This is where starter kits like AppLighter come in. They build on this powerful foundation by giving you a pre-configured, production-ready template. This lets you skip all the tedious boilerplate setup for authentication, navigation, and state management so you can get right to building the features that make your app unique.
For a clearer picture, here’s a quick comparison of what you get with Expo's managed workflow versus going the traditional React Native CLI route.
Expo Managed Workflow vs Traditional React Native CLI
| Feature | Expo Managed Workflow | React Native CLI |
|---|---|---|
| Setup Time | Minutes. npx create-expo-app and go. | Can be hours. Requires Xcode, Android Studio, and SDK installations. |
| Native Code | Abstracted away. You stay in JS/TS. | Required. You manage iOS and Android projects directly. |
| Live Reloading | Instant on-device testing with Expo Go. | Requires running a simulator or connecting a device via cable. |
| Build Process | Simplified cloud builds with EAS. | Manual configuration and building via Xcode/Android Studio. |
| Updates | Easy Over-the-Air (OTA) updates. | App store submission required for every change. |
| Extensibility | Full native library support via dev builds. | Full native access from the start. |
Ultimately, choosing the Expo managed workflow means you're prioritizing speed and a smoother developer experience, which is exactly what we’ll be focusing on in this tutorial.
Setting Up Your First Expo Project
 A close-up of a laptop screen displaying 'Create Project' in a modern office setup.
Alright, enough theory. This is where we roll up our sleeves and turn an empty folder into a real, running cross-platform app. Getting this initial setup right is crucial, as it lays the foundation for everything we'll build on top of it.
First things first, we need to make sure your machine has the right tools. The entire Expo and React Native ecosystem runs on Node.js, so that's our starting point. If you don't have it installed, I strongly recommend using a version manager like nvm for macOS/Linux or nvm-windows for Windows. Trust me, it makes switching between Node versions for different projects a breeze.
Installing Your Core Development Tools
Before you write a single line of code, you need Node.js. You'll want an active LTS (Long-Term Support) version—right now, anything version 18 or higher is a solid choice. You can quickly check what you're running by popping open a terminal and typing node -v.
With Node.js in place, the next step is installing the Expo CLI (Command Line Interface). This is your command center for creating, running, and managing projects. You can install it globally with a quick npm command.
Fire up your terminal and run this:
npm install -g expo-cli
This command fetches the package and makes the expo command available system-wide. To double-check that it worked, just run expo --version. If a version number appears, you're all set.
Creating Your First Expo App
Now for the fun part: actually creating the project. Expo gives us a simple command, create-expo-app, that scaffolds a brand-new application with all the boilerplate already handled.
Find a good spot on your computer for your projects, cd into that directory, and run:
npx create-expo-app my-first-app
Feel free to swap my-first-app with your own project name. The CLI will then ask you to pick a template. For this tutorial, we’ll go with the Blank (TypeScript) option. It’s a clean slate but comes with TypeScript ready to go, which is pretty much the standard for building robust apps these days.
Once the installer finishes its thing, jump into your new project directory:
cd my-first-app
Everything you need for your app now lives inside this folder.
Quick Tip: If you're looking to bypass this manual setup and hit the ground running, a production-ready starter-kit like AppLighter can be a massive time-saver. It comes pre-configured with navigation, authentication, and state management, letting you skip straight to building features.
Understanding the Project Structure
When you peek inside the my-first-app directory, you'll see a few files and folders. Let's quickly go over the most important ones so you know your way around.
node_modules/: This is where all the third-party code your project depends on lives. You'll almost never need to go in here yourself.app/: Using Expo Router, this is the heart of your application. Every file you create in here automatically becomes a screen or a route. We’ll be spending a lot of time in this folder.app.json: Think of this as your app's main configuration file. You’ll edit this to set your app's name, icon, splash screen, version number, and other critical metadata.package.json: This file lists all your project's dependencies and defines helpful scripts for running, testing, and building your app.tsconfig.json: This is the rulebook for the TypeScript compiler. It tells TypeScript how to check your code and catch potential errors before they become bugs.
This clean, logical structure is one of the best parts of starting a project with Expo. It keeps things organized, which is a lifesaver as your app gets more complex.
Running Your App for the First Time
With our project created, let's fire it up. Expo uses a development server called the Metro Bundler to compile your code and serve it to your device or emulator.
From your project's root directory, run:
npx expo start
Your terminal will come to life, displaying a big QR code and some helpful instructions. This is where the magic really kicks in. You can now run the app in several ways:
- On a Physical Device: The easiest way. Just download the Expo Go app from the App Store or Google Play. Scan the QR code with your phone, and your app will load right up.
- On an iOS Simulator: If you're on a Mac with Xcode installed, just press
iin the terminal. Expo will automatically boot the simulator and install your app. - On an Android Emulator: If you have Android Studio set up with a virtual device running, press
ain the terminal.
That's it! The ability to run your code on any platform with a single command is a huge part of what makes the Expo workflow so powerful. You've officially built and launched your first cross-platform application.
Building Screens and Navigation with Expo Router
Alright, you've got a running project—that's the hard part done. Now comes the fun stuff: building the actual screens your users will see and connecting them all together. This is where your app starts to feel real.
At its core, any React Native app is just a collection of components. The two you'll use constantly are <View>, which is your go-to container (think of it like a <div> in web development), and <Text> for, well, text. We'll use these to sketch out a couple of basic screens: a Home screen and a Profile screen.
The secret sauce here is Expo Router. It uses a file-based routing system, which is a fantastic way to work. In simple terms, the way you organize files in your app/ folder is your app's navigation. No complex config files, just pure, intuitive structure.
Creating Your First Screens
Let's dive in and create our home screen. Pop open the app directory, and you should find an index.tsx file. By convention, this is the root of your app—the first thing people see. We're going to make it our own.
Replace the contents of app/index.tsx with this little snippet:
import { StyleSheet, Text, View } from 'react-native';
export default function HomeScreen() {
return (
const styles = StyleSheet.create({ container: { flex: 1, alignItems: 'center', justifyContent: 'center', }, title: { fontSize: 24, fontWeight: 'bold', marginBottom: 8, }, });
Easy enough. Now, for the second screen. Simply create a new file named profile.tsx right next to index.tsx inside the app directory. Just by creating that file, Expo Router automatically knows there's a new route available at /profile. It’s that simple.
Here’s the code to drop into app/profile.tsx:
import { StyleSheet, Text, View } from 'react-native';
export default function ProfileScreen() {
return (
const styles = StyleSheet.create({ container: { flex: 1, alignItems: 'center', justifyContent: 'center', }, title: { fontSize: 24, fontWeight: 'bold', }, }); And just like that, you have two screens. But they're islands right now. How do we build a bridge between them?
Linking Screens Together
Expo Router gives us a handy <Link> component that feels just like a web anchor tag. You wrap it around some text or a button, tell it where to go, and it handles the rest.
Let's wire up our Home screen to navigate to the Profile screen. We'll need to tweak app/index.tsx slightly.
import { Link } from 'expo-router'; import { StyleSheet, Text, View } from 'react-native';
export default function HomeScreen() {
return (
const styles = StyleSheet.create({ // ... existing styles link: { marginTop: 16, color: 'blue', }, }); Refresh your app, and you should see a "Go to Profile" link. Tap it. See that smooth transition? Expo Router even throws in a back button in the header for free, giving you that native stack navigation feel right out of the box.
I can't overstate how much of a game-changer file-based routing is. You can literally glance at your
appdirectory and instantly understand the entire navigation map of your application. It makes projects so much easier to maintain and scale.
Passing Data Between Screens
Most of the time, you don't just want to go to a screen; you want to go there with some information. Think about tapping on a user's name in a list to see their specific profile. To do this, you need to pass data, like a user ID, between screens. Expo Router handles this beautifully with dynamic routes.
Let's refactor our profile screen to be more dynamic. First, rename the file from app/profile.tsx to app/[userId].tsx. Those square brackets are a special signal to Expo Router, telling it that userId isn't a literal route name but a placeholder for a dynamic value.
Now, how do we grab that value inside our component? We use a hook called useLocalSearchParams.
Let's update app/[userId].tsx to look like this:
import { useLocalSearchParams } from 'expo-router'; import { StyleSheet, Text, View } from 'react-native';
export default function ProfileScreen() { const { userId } = useLocalSearchParams();
return (
const styles = StyleSheet.create({ // ... existing styles userIdText: { marginTop: 8, fontSize: 18, }, });
The final piece of the puzzle is to update the <Link> on our Home screen (app/index.tsx) to send an actual ID. Let's pretend we're linking to the profile for a user with the ID 123.
// in app/index.tsx
Go to User 123's Profile Now when you tap the link, you'll be taken to the profile screen, and it will display "Profile for User" followed by "123". This is the bread and butter of building data-driven apps, and Expo Router makes it feel incredibly natural.Implementing User Authentication and State Management
Alright, we've got the basic structure of our app with screens and navigation. It's a solid skeleton, but now it's time to add the nervous system—the part that handles user data, manages sessions, and keeps track of what's happening across the entire app.
This is where a lot of tutorials get a bit fuzzy, but getting this right is arguably the most important part of building a real-world application.
We're going to tackle two crucial pieces: authentication and global state management. For authentication, we'll use Supabase, an open-source Firebase alternative with a ridiculously easy-to-use API for managing users. For state, we'll pull in Zustand, a tiny and fast solution that skips all the boilerplate you often find with other state management tools.
The mobile app market is absolutely exploding, with projections to hit a market volume of US$1,103.48 billion by 2034. This kind of growth is exactly why we need frameworks that simplify complex tasks like auth, so we can build and scale apps without getting bogged down. If you're curious, you can discover more insights about the future of React Native app development and see how tools like Expo are rising to the challenge.
Setting Up a Secure Auth Flow with Supabase
Let's be real: handling sign-ups, sign-ins, and user sessions from scratch is a massive pain. Thankfully, Supabase makes it almost a non-issue. It provides a secure backend with a whole suite of authentication functions we can access through a simple JavaScript client.
First things first, you'll need a Supabase project. Head over to their site, create an account, and spin up a new project. Once that's ready, find the API settings and grab your Project URL and your anon (public) key. These are the credentials your Expo app will use to talk to your Supabase backend.
In your project terminal, let's install the Supabase client library:
npx expo install @supabase/supabase-js
Next, we need a way to share the user's session status—whether they're logged in or not—across the entire app. The perfect tool for this job is React's built-in Context API. We'll create a session context that can provide the current user's status to any component that needs to know.
By combining a powerful backend-as-a-service like Supabase with React Context, you can build a robust, secure authentication system in a fraction of the time it would take to build from scratch. This is a huge advantage for solo developers and small teams.
Creating Protected Routes
A critical piece of any auth system is protecting certain screens. You don't want just anyone accessing a user's profile page, right? Expo Router makes this surprisingly clean with a special file convention.
We can create a layout route that essentially acts as a bouncer. If a user is logged in, the layout lets them through and renders the child screen. If not, it redirects them to the login page. This elegant approach keeps your authentication logic in one place and your screen components focused on their own jobs. You simply check the session status from our context, and if it's null, you use the Redirect component from Expo Router to send them on their way.
The diagram below gives you a bird's-eye view of how these pieces fit together, from individual screens to the navigation that connects them.
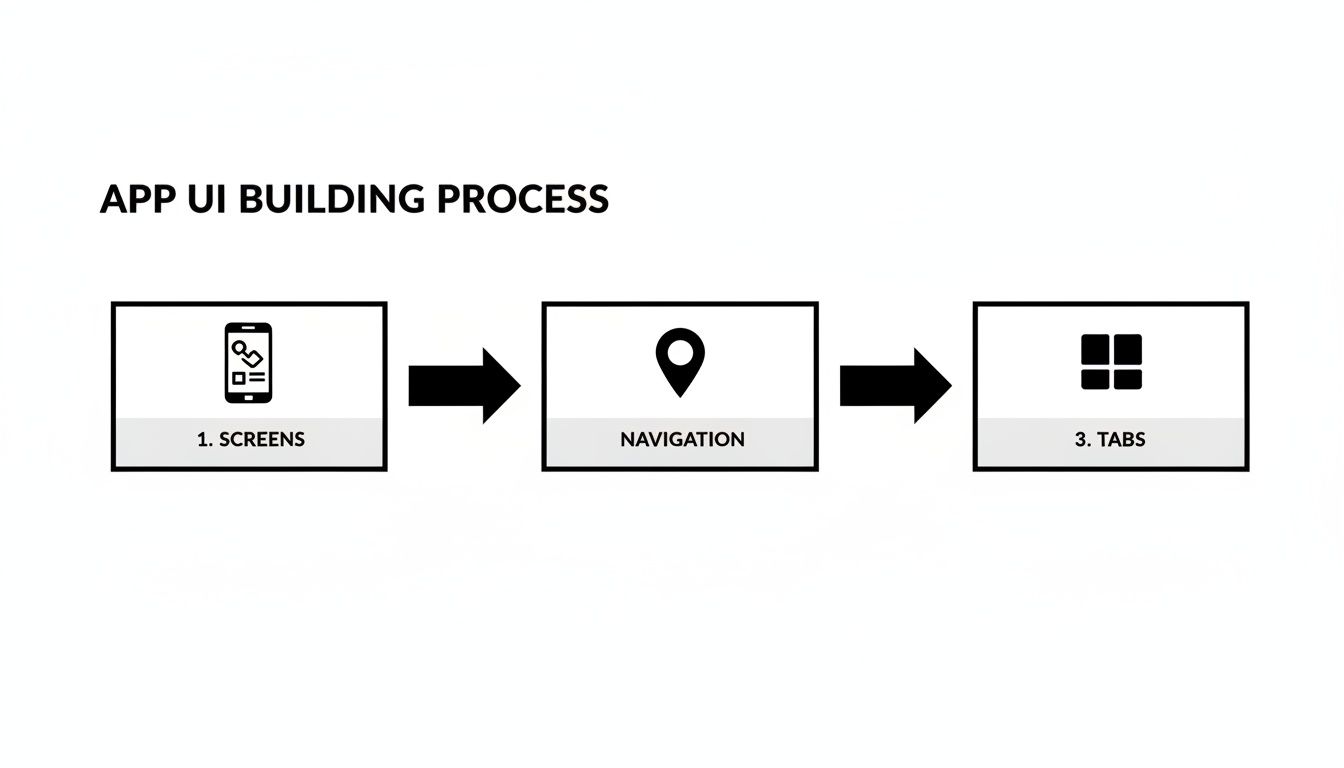 Diagram showing the app UI building process with steps: screens, navigation, and tabs.
This flow underscores why a structured approach is so important. You start with the basic building blocks (screens) and then layer on the connections (navigation) to create a scalable architecture.
Lightweight Global State with Zustand
React Context is fantastic for the user session, but what about other global data? I'm talking about things like loading indicators, user preferences, or cached data from an API. Trying to cram all of that into a single, massive context is a surefire way to kill your app's performance.
This is exactly where Zustand shines. It’s a minimal state management library that lets you create small, independent "stores" for different pieces of your app's state. It uses a simple hook-based API that feels just like using React's own useState, but it's accessible from anywhere in your component tree.
For example, let's say we need a global loading indicator. With Zustand, we can create a useLoadingStore in just a few lines of code:
import { create } from 'zustand';
const useLoadingStore = create((set) => ({ isLoading: false, setLoading: (status) => set({ isLoading: status }), }));
And that's it. Now, any component can call useLoadingStore() to get the current isLoading status or the setLoading function to change it. No providers, no complicated setup. Just clean, simple state management that scales beautifully.
For anyone working through a complex expo react native tutorial, getting a handle on both authentication and state management is non-negotiable. These systems are what turn a pile of screens into a real, functional application. While we've walked through the manual setup here, it's worth pointing out that a starter kit like AppLighter comes with all of this integrated out of the box—Supabase auth, Zustand state management, and protected routes are all wired up and ready to go.
Taking Your App Live with EAS
 A developer working on a computer, displaying 'Deploy to Store' message, holding a smartphone.
You've built the screens, wired up the navigation, and locked down authentication. Now for the most exciting part: shipping your app so real people can actually use it. This is where all your hard work pays off, and thankfully, Expo has a fantastic set of tools to make this notoriously painful process surprisingly smooth.
We're going to lean on Expo Application Services (EAS), a suite of cloud services that takes the headache out of building and submitting your app. Say goodbye to wrestling with complex Xcode and Android Studio configurations. EAS handles all that behind the scenes in a clean, repeatable way.
Getting Your App Ready for the Real World
Before we can build, we need to give the app stores some basic info about our project. This all happens in your app.json (or app.config.js) file. Getting these details right is crucial for making a good first impression on the App Store and Google Play.
Here are the key fields you'll want to double-check:
nameandslug: The public name of your app and its URL-friendly version.version: Your app's version number, like1.0.0. You'll bump this up with every new release.iconandsplash: Paths to your app icon and the splash screen image that shows up when the app launches.ios.bundleIdentifierandandroid.package: These are the unique IDs for your app on each platform, usually in a reverse-domain format likecom.yourcompany.appname.
A word of advice: get these identifiers right from the start. Changing them after your app is live is a massive headache you want to avoid.
Building for iOS and Android with EAS Build
With your config dialed in, it's time to create a production-ready build. EAS Build is a cloud service that takes your code and compiles it into the final package the stores expect (.ipa for iOS, .aab for Android).
First, you’ll need to grab the EAS command-line tool and log in.
npm install -g eas-cli eas login
Next, run eas build:configure in your project. This handy command creates an eas.json file, which lets you set up different build "profiles" for things like development, internal testing, and production.
When you're ready to build for both platforms, the command is beautifully simple:
eas build --platform all
The first time you run this, EAS will offer to generate all the necessary security credentials for you—signing certificates, provisioning profiles, the works. This part alone can take developers days of frustrating manual work, but EAS knocks it out in minutes. It's one of the most magical parts of the Expo ecosystem.
Once the builds are done, EAS gives you a secure link to download your app files, ready for submission.
Submitting to the App Stores with EAS Submit
You've got the build file. Now what? You have to get it to Apple and Google for review. Again, EAS has a tool for that: EAS Submit.
This command takes your finished build and uploads it directly to App Store Connect or the Google Play Console, handling all the tricky API stuff for you.
For instance, to submit your latest iOS build, you’d just run:
eas submit --platform ios
The CLI will walk you through the process, prompting for your Apple ID or any other required credentials. It completely eliminates the need for separate, clunky tools like Apple's Transporter app.
Deploying the Web Version to Vercel
One of the great things about this expo react native tutorial is that we've been building for the web all along. To get it live, we first need to generate a static, optimized build of our site.
Just run this command in your terminal:
npx expo export -p web
This creates a dist folder packed with all the HTML, CSS, and JavaScript your web app needs. From here, deploying with a service like Vercel is a breeze. Once you connect your GitHub repo to Vercel, it automatically detects the Expo project, builds it, and deploys it globally every time you push a change.
The power of this stack is hard to overstate. React Native currently holds a 38% market share in the cross-platform development space, which speaks volumes about its reliability and the strong community backing it. By choosing this path, you're building on a mature, well-supported platform. You can dig into more data on React Native's market position here.
Got Questions About Expo? We've Got Answers
As you dive into any Expo React Native tutorial, you're bound to hit a few snags or have some questions pop up. It happens to everyone. Let's walk through some of the most common ones I hear from developers, so you can get unstuck and back to building.
Expo Go vs. Development Builds: What's the Difference?
Think of Expo Go as your trusty sidekick for quick development cycles. It's a pre-built app you grab from the app stores, and it can run your project’s JavaScript almost instantly. It's fantastic for hammering out UI changes and testing logic because it's so fast. The catch? You're limited to the native modules already included in the Expo Go app itself.
A development build, however, is your app's own custom-tailored container. You'll create one whenever you need to add a library with native code that isn't part of the standard Expo Go client. This gives you the best of both worlds: you still get the fast refresh and handy developer menu, but now you have the freedom to use any library in the entire React Native ecosystem.
Can I Really Use Any React Native Library with Expo?
Yes, you absolutely can. This is one of the biggest game-changers for modern Expo. A few years ago, the "managed workflow" had a reputation for being restrictive, but that's ancient history now.
Thanks to development builds, you can pull in pretty much any React Native library, even if it has custom iOS or Android code. The process is simple: when you add a new native dependency, you just generate a fresh development build. EAS (Expo Application Services) handles the heavy lifting, compiling that library into your custom client, ready for you to test. You get the full power of the React Native ecosystem without giving up the smooth Expo experience.
How Should I Handle Environment Variables in an Expo Project?
Expo has a great, built-in system for this. Just create a file called .env in your project's root directory to define your variables.
The key thing to remember is that any variable you want to access in your app's code needs to be prefixed with EXPO_PUBLIC_. For instance:
EXPO_PUBLIC_API_KEY=your_key_here
You can then read it in your components with process.env.EXPO_PUBLIC_API_KEY. This prefix is a smart security measure—it forces you to be intentional about what you expose, preventing you from accidentally leaking a private server key into your app bundle.
For truly sensitive secrets that have no business being on the client-side (like a private database key), you should be using EAS Secrets. It's a service that injects your secrets securely on the server during the build process, so they never end up in the final app binary.
What Is EAS and Why Should I Bother Using It?
EAS stands for Expo Application Services, and it's a collection of cloud services that honestly takes the pain out of the most tedious parts of mobile development. It's designed to automate the stuff nobody likes doing.
It handles things like:
- EAS Build: Compiles your app into the final
.ipaor.apkfiles in the cloud, so you don't need a Mac to build for iOS. - EAS Submit: Automates the nightmare of uploading and submitting your app to the Apple App Store and Google Play Store.
- EAS Update: Lets you push over-the-air (OTA) updates—think bug fixes or small tweaks—directly to your users, completely bypassing the lengthy store review process.
So, why use it? Because it saves you an incredible amount of time and headaches. It manages all the complex native build configurations, code signing, and deployment pipelines, letting you just focus on what matters: building a great app.
Ready to skip the boilerplate and launch your next app faster? AppLighter is a production-ready starter-kit built on Expo and Supabase, pre-configured with authentication, state management, and navigation. Get a massive head start on your project.
Related Articles

Expo vs React Native A Developer's Definitive Comparison
Choosing between Expo vs React Native? This guide provides a nuanced comparison of developer experience, native modules, and build workflows to help you decide.

React Native Maps Guide 2026: Google Maps + Best Libraries
A practical guide to integrating React Native Google Maps in Expo. Learn to set up API keys, add custom markers, optimize performance, and ship your app.

Explore charts react native: Build Interactive Charts in Mobile Apps
Practical guide to charts react native: choose libraries, connect data with Supabase, and optimize performance for Expo apps.