How to Build an App from Idea to Launch
Learn how to build an app with our practical guide. We cover everything from initial setup and coding core features to testing and App Store deployment.

To build a great app, you need more than just a good idea. You need a clear strategy that lets you execute quickly and stand out from the crowd. The smart way to do this now is by starting with a pre-configured kit, like AppLighter for Expo/React Native. It handles all the tedious, foundational setup so you can jump right into building the features that actually matter. This approach is all about getting from concept to a real, market-ready product, fast.
Why Building an App Is a Race Against Time
Launching an app these days feels less like a product release and more like trying to be heard in a hurricane. Speed isn't just a goal; it's your most critical asset. This guide is all about cutting through the noise and giving you a direct path to building your app efficiently, without sacrificing quality.
 Three colleagues collaborate in an office, one writing on a flip chart, with multiple clocks on a blue wall.
Think of AppLighter not just as another tool, but as your strategic advantage. It’s a production-ready starter kit built for founders and developers who know that time is the one resource they can't get back.
The Challenge of a Drowningly Crowded Market
The competition out there is just staggering. You could launch the most brilliant mobile app, only to see it disappear under the 998 new apps that hit Google Play every single day. In just one recent month, over 46,000 new apps were launched.
This explosion is happening because the global mobile app market is worth over $750 billion and is on its way to $1.1 trillion. People are glued to their phones, spending an average of 4.6 hours a day on them, with a whopping 90% of that time spent inside apps. You can dig deeper into the numbers in this report on mobile app development statistics.
This environment puts incredible pressure on you to not just innovate, but to ship before someone else beats you to it.
The biggest risk isn't building the wrong thing; it's building the right thing too slowly. In the app world, a six-month delay can be the difference between being a market leader and a forgotten project.
Skipping the Common Hurdles from Day One
Every developer who sets out to build an app runs into the same early roadblocks. These foundational tasks are absolutely necessary, but they can eat up weeks or even months before you write a single line of code for your actual idea.
We're talking about hurdles like:
- Mind-Numbing Boilerplate: Setting up the project structure, environment variables, and basic configs is tedious but has to be done.
- Wiring Up Authentication: Implementing secure sign-up, login, and session management is complex and completely non-negotiable.
- Nailing Down Navigation and State: Architecting a logical flow and managing data across the app requires serious upfront planning.
- Juggling Cross-Platform Code: Making sure your app feels right on iOS, Android, and the web is a massive undertaking on its own.
This is exactly where a pre-configured template like AppLighter comes in. It gives you a solid, pre-wired foundation so you can bypass that initial grind and get straight to building the features that will make your app a success.
Kicking Off Your Project with AppLighter and Expo
Before you write a single line of your app's core logic, you have to build the house it's going to live in. Let's be honest, starting a new project from scratch can be a real grind. You're trying to build a solid foundation, but it often feels like you're just wrestling with configs, boilerplate, and repetitive setup tasks. It's slow, tedious, and can easily burn through your first week of development.
This is exactly why I'm a huge fan of using a good starter kit. A tool like AppLighter can transform what used to be weeks of foundational work into just a few minutes of setup. It’s not about cutting corners; it’s about starting the race from the halfway point.
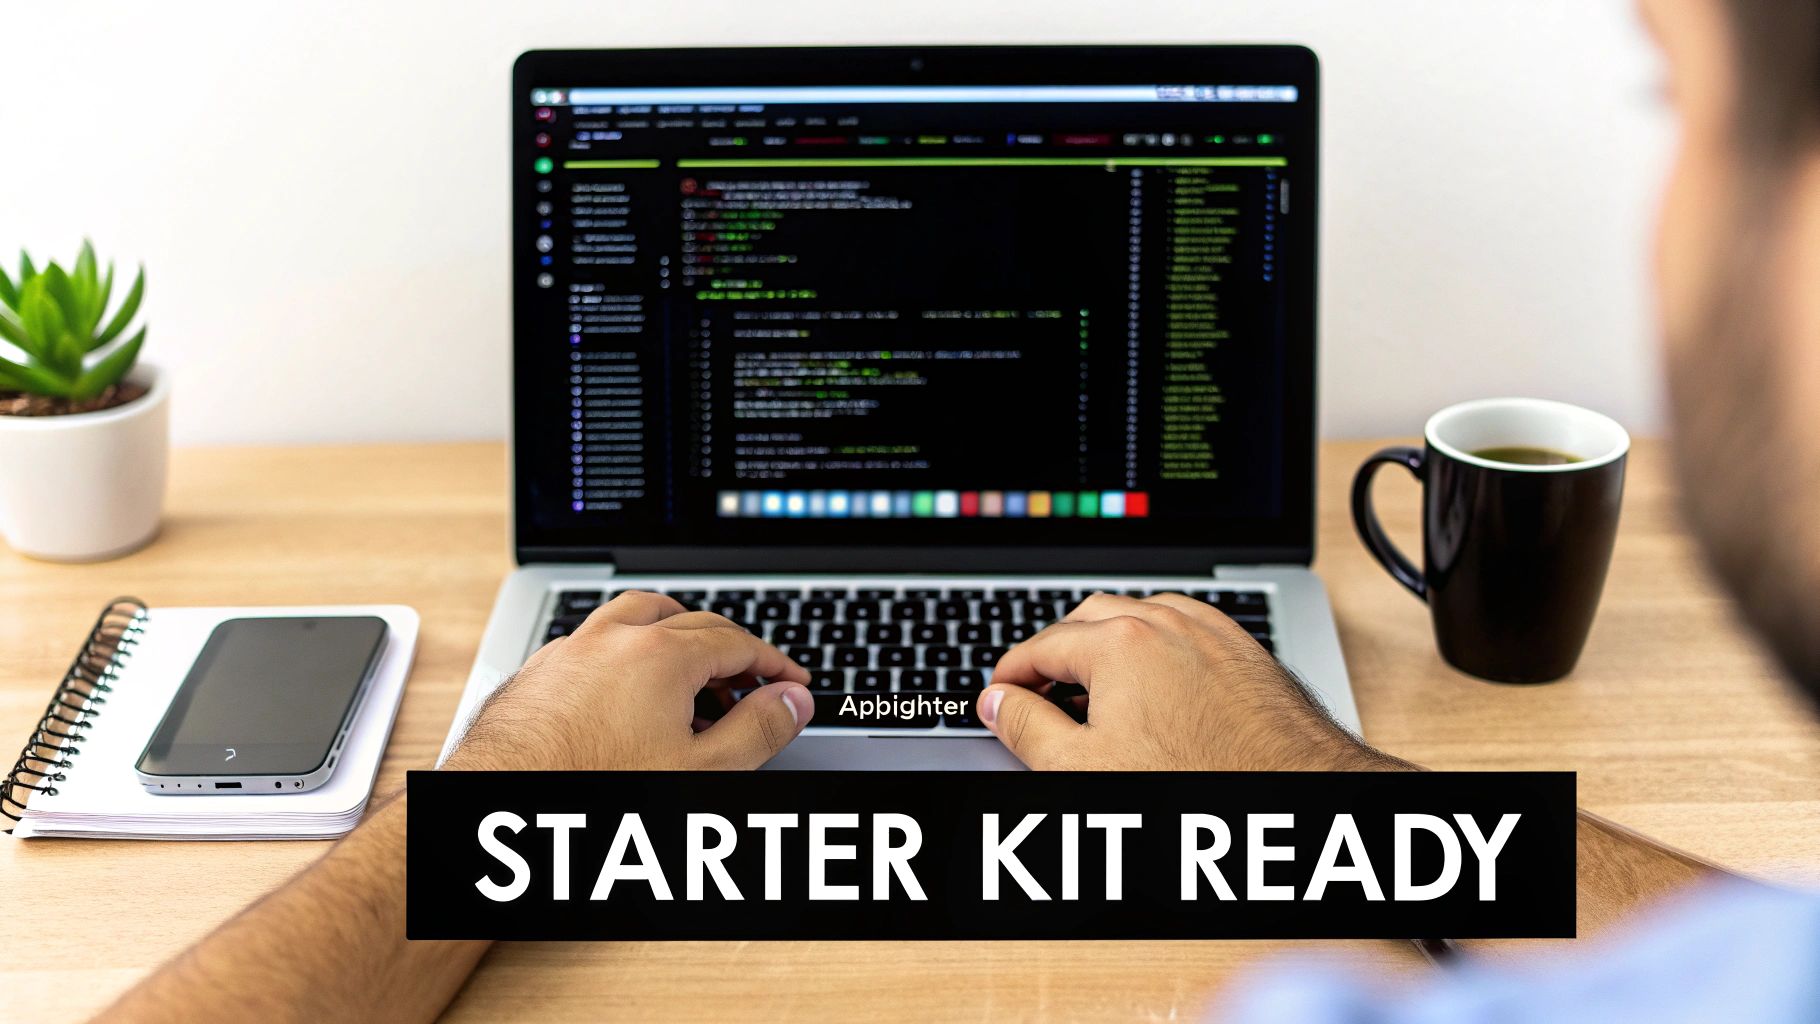 A developer's hands on a laptop keyboard, displaying code, with coffee and a plant on the desk.
AppLighter is built on top of Expo and React Native, which means you get a universal codebase that runs beautifully on iOS, Android, and the web. No more managing separate projects—you build once and deploy everywhere. You get to skip the boring stuff and jump right into what matters: building your unique features.
Firing Up Your Development Environment
Getting started is refreshingly simple. First, you'll clone the AppLighter repository from GitHub. Think of this less like downloading files and more like inheriting a fully-vetted, production-ready architecture that's been battle-tested.
Once you have the code, a single npm install command pulls in all the curated dependencies. These aren't just a random collection of packages; they're a hand-picked suite of tools designed to work together without conflicts.
Finally, run the start command. This boots up the development server, and just like that, you can see your app running in an iOS simulator, an Android emulator, or right in your web browser.
What you’ll see isn't just a "Hello, World!" screen. It’s a real, functioning app with some of the most time-consuming features already built for you:
- Ready-to-Go Authentication: A complete sign-up and login flow using Supabase is already wired up. This means user sessions, password resets, and security are handled right out of the box.
- File-Based Navigation: The app uses Expo Router, so navigation is as simple as creating a file. Want a new "Profile" screen? Just create
profile.tsx. It’s incredibly intuitive. - Global State Management: No need to spend hours setting up Redux or Zustand. Global state is already configured, so you can manage data across your entire application from day one.
To give you a better idea of how much time this saves, here’s a quick breakdown of what you get with AppLighter.
AppLighter Core Features and Their Benefits
| Feature | What It Is | Why It Matters |
|---|---|---|
| Authentication | Pre-built user sign-up, sign-in, and session management with Supabase. | Skips 15-20 hours of complex, security-critical setup. |
| Navigation | File-based routing with Expo Router, including tab and stack navigators. | Eliminates 5-8 hours of boilerplate for setting up app navigation. |
| State Management | Pre-configured global state using Zustand. | Saves 3-5 hours of configuration and lets you share data easily. |
| UI Components | A library of ready-to-use, themed components like buttons and inputs. | Immediately speeds up UI development, saving 10+ hours. |
| Push Notifications | A complete setup for sending and receiving push notifications. | Avoids 8-12 hours of tricky native configuration. |
| CI/CD Pipeline | A GitHub Actions workflow for automated builds and deployments. | Sets up a professional deployment process in minutes, not days. |
As you can see, this isn't just a template; it's a massive head start.
Understanding the Project Structure
A well-organized codebase is your best friend for long-term maintainability. AppLighter gives you a clean, logical structure from the get-go, so you never have to wonder where a component or service should live.
For instance, inside the app directory, you'll see a (tabs) folder. Each file in here corresponds directly to a screen in your app's main tab bar. This file-based routing from Expo Router is a game-changer for keeping your navigation logic clean and easy to understand. You'll also find dedicated folders for things like theming, making it a breeze to update colors and fonts to match your brand's identity.
The real power of a starter kit isn't just the code it gives you, but the decisions it has already made for you. It provides an opinionated framework that enforces best practices from the very first commit.
This pre-configured environment frees you up to focus on the creative work—the features that make your app special. Instead of spending your first week getting tangled in authentication logic or build configs, you can build an app that delivers value to your users faster. You’re not just saving time; you’re starting with a foundation that’s built to scale.
Using Integrated AI to Speed Up Your Development
Building an app today isn't just about grinding out code line by line. It's about building smarter and faster. Artificial intelligence has become a non-negotiable part of the modern developer's toolkit, and with AppLighter, that advantage is baked right into your workflow from day one. This isn't about replacing you—it's about giving you superpowers to turn hours of tedious work into minutes of creative problem-solving.
This shift isn't just a hunch; the numbers back it up. A staggering 63% of developers are already using AI in their daily work. They're using it for everything from making apps more personal (44%) to drastically improving the user experience (70%). It's no wonder this market is projected to skyrocket to $221.9 billion. AI isn't just a shiny new feature; it's fundamental to how we build an app now. You can dig into more of these trends in this detailed mobile market report.
Let Claude Code Automate the Best Practices
One of the first things you'll notice in AppLighter is the pre-configured set of Claude Code rules. I like to think of them as an AI-powered code reviewer that never sleeps. It works right alongside you, patiently enforcing best practices and keeping your codebase clean and consistent. It's like having a senior dev on your team who catches the small mistakes before they snowball into big headaches.
These rules are much smarter than a simple linter. They understand the context of your React Native and Expo project, offering genuinely helpful suggestions to make your code more maintainable and performant.
- Keeps Everything Consistent: The rules make sure every component, function, and style follows the same pattern across the board. This makes the code way easier for you (and your team) to read and debug later.
- Enforces Best Practices: It automatically flags common anti-patterns you might see in React Native, nudging you toward better solutions for state management or component design.
- Stops Bugs Before They Start: By catching potential issues early, these rules help prevent a ton of common bugs that slow down development and frustrate users.
With this automated guidance handling the small stuff, you can free up your mental energy to focus on what really matters: building great features.
Supercharge Your Workflow with Cursor Plugins
While Claude Code works quietly in the background, AppLighter’s integration with Cursor plugins brings AI front and center as your active coding partner. Cursor is an AI-first code editor, and the plugins we've included in the starter kit are designed specifically for the world of Expo and React Native. This is where you really start to see the speed gains.
Let's say you need to build a new user profile screen. Instead of hammering out all the boilerplate yourself, you can give the AI a simple prompt.
Example Prompt:
"Create a new React Native component named UserProfileScreen. It should display a user's avatar, name, and email. Include an editable 'Bio' section and a 'Save Changes' button."
In a matter of seconds, the AI spits out the complete component. We're talking imports, state hooks, JSX structure—the works. And it’s not some generic template; it’s smart enough to understand your project's existing components and styling, so it fits right in.
The real magic here is letting AI handle the repetitive, mind-numbing tasks. It keeps you in a state of creative flow, focused on the logic and user experience instead of getting bogged down in syntax.
But it doesn't stop at generating new code. These plugins are incredible for refactoring. Just highlight a messy, complicated function and ask the AI to "refactor this for clarity and performance." It will instantly break it down into smaller, cleaner functions, add comments, and optimize the logic, all without changing what it does. This cycle of generating, refining, and refactoring with an AI assistant is how you build high-quality features faster than ever before.
Putting the Pieces Together: Building Your First Core Feature
Alright, with the groundwork laid and our AI tools warmed up, it's time for the fun part: actually building something. This is where a good starter kit really proves its worth, taking you from a blank slate to a working screen in minutes, not hours. We're going to move past the setup and get our hands dirty.
For this guide, we’ll build out a classic, must-have feature: a dynamic list that pulls data from a backend. Think of a social media feed, a product catalog, or even a simple to-do list. This one example hits all the major points: creating a new screen, fetching data, and managing the state of that data.
Crafting a New Screen with Expo Router
First things first, any new feature needs a place to live. In the AppLighter setup, creating a new screen is almost laughably easy, all thanks to Expo Router. The days of wrestling with navigation configuration files are over. Here, if you want a new screen, you just make a new file.
Let's build a screen to show a feed of posts.
- Jump into the
app/(tabs)directory in your project. - Create a new file and name it
feed.tsx.
And that's it. Seriously. By creating that single file, Expo Router automatically wires it up and adds a "Feed" tab to your main navigation bar. The file's name becomes the route, which makes the whole project incredibly intuitive. This file-based routing is a massive time-saver when you need to build an app with lots of interconnected screens.
Now, inside feed.tsx, you can drop in a basic React Native component to act as a placeholder. This is our canvas.
Fetching Data from Your Backend
An empty screen is pretty boring, so let's pull in some real data. AppLighter is already configured with a clean API layer that makes talking to your backend a breeze. It's a type-safe setup, which means you can call your API endpoints with confidence, knowing exactly what kind of data you're going to get back.
For our feed, we'll need an API endpoint that serves up a list of posts. The starter kit gives you a clear pattern for this. You'll write a function that handles the API call, including error handling and data parsing, keeping all that logic separate from your UI.
This approach keeps your components clean. They don't need to know about HTTP requests or how to parse JSON; they just get the data they need and display it. This separation of concerns is a cornerstone of building apps that don't become a tangled mess later on.
A personal rule I live by: if a UI component is making a direct API call, it’s probably doing too much. Pulling that logic into its own dedicated service or hook makes your code so much easier to test, reuse, and debug when things inevitably go wrong.
Once that data-fetching function is ready, you can call it from your feed.tsx screen using a standard React hook like useEffect. Just like that, data flows from the backend into your component, ready to be shown to the user.
Managing and Displaying State
We've got the data, but now we have to manage it. Is it still loading? Did the request fail? What's in the actual list of posts? While AppLighter includes Zustand for more complex global state, for a single screen like this, React's own useState hook is usually all you need.
You'll typically want to track a few pieces of local state for a screen that fetches data:
posts: An array to hold the list of posts after they arrive.isLoading: A boolean that tells you if you're still waiting for the data. This is perfect for showing a loading spinner.error: A place to store an error message if the API call fails, so you can show the user something helpful.
Managing these states is what separates a clunky app from a professional one. You can show a loading indicator while the posts are being fetched and display a friendly error message if the network drops. This avoids that dreaded user experience of staring at a blank, frozen screen.
Finally, to actually display the list, you'll use React Native's FlatList component. It's highly optimized for rendering long, scrollable lists, keeping your app feeling smooth and responsive even with hundreds of items. You simply pass your posts array to its data prop, tell it how to render each item, and it takes care of the rest. This whole workflow—from creating the file to showing dynamic data—is a perfect example of how AppLighter's pre-configured parts work in harmony, letting you build an app feature far faster than starting from scratch.
From Localhost to a Live App: The Final Mile
It's a great feeling when your app runs flawlessly on your local machine. But let's be real—an app isn't done until it's in the hands of users. This final stretch is where you switch gears from feature development to ensuring rock-solid stability, automating your deployment pipeline, and navigating the often-tricky app store submission process.
Before we dive into the deployment details, it’s worth remembering how we got here. Every feature you've built boils down to the interplay between screens, data, and state.
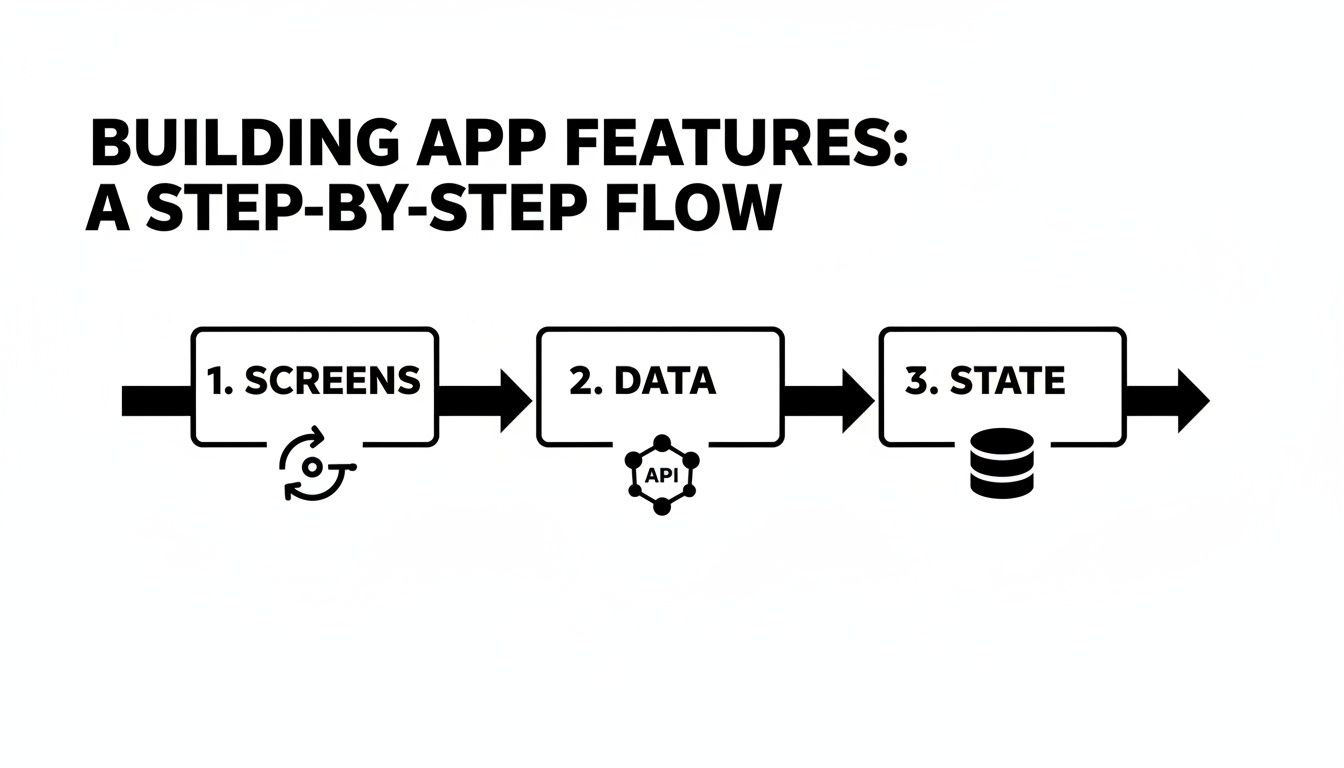 A step-by-step flowchart illustrates building app features through Screens, Data, and State.
This simple flow represents countless hours of work. Now, it's time to make sure all those moving parts are bulletproof before they face the real world.
Solidifying Your App with Comprehensive Testing
Before you even think about shipping, you need to be confident that your app works exactly as you intended. A smart testing strategy is your best defense against finding embarrassing bugs after launch. Luckily, the React Native and Expo ecosystem gives us some powerful tools for the job.
I've found that a balanced approach works best:
- Unit Tests: Think of these as quick, focused checks on individual pieces of your code. Using a library like Jest, you can instantly verify that a specific function spits out the right value or a small component renders the correct text. They're fast and essential for code-level confidence.
- End-to-End (E2E) Tests: This is where you simulate a real person using your app. E2E tests will tap through screens, fill out forms, and complete entire tasks, just like a user would. Tools like Detox or Maestro are fantastic for this and integrate nicely with Expo projects.
My rule of thumb? Always start by writing E2E tests for your most critical user journeys. If someone can't sign up, log in, or make a purchase, the rest of the app doesn't really matter. Nailing these core flows gives you the biggest bang for your buck early in the testing process.
Automating Your Builds with EAS and CI/CD
Manually building and deploying an app is slow, tedious, and a surefire way to make a mistake. This is where Expo Application Services (EAS) becomes your best friend. EAS is a cloud service from the Expo team that handles the entire complicated process of building and submitting your iOS and Android apps.
To take it a step further, you'll want to set up a Continuous Integration and Continuous Deployment (CI/CD) pipeline. This sounds complex, but AppLighter comes with a pre-configured GitHub Actions workflow that does the heavy lifting for you.
It's a simple, powerful cycle:
- Push Your Code: Every time you push a new commit to your main branch on GitHub, the automation kicks in.
- Trigger an EAS Build: The GitHub workflow automatically tells EAS to start building your native app binaries for both iOS and Android in the cloud.
- Submit Automatically: Once the builds pass, the pipeline can be set up to automatically submit the new versions to the Apple App Store and Google Play Store for review.
With this setup, you can go from a code change to a live update with almost no manual effort. It completely changes how quickly you can build an app and push improvements.
The Final Push to the App Stores
Submitting to the app stores for the first time can feel like a black box. Both Apple and Google have strict guidelines, and a minor misstep can lead to a rejection that delays your launch.
Here’s a quick pre-flight checklist to help you avoid the most common problems:
- App Store Metadata: Have your final app name, description, keywords, and privacy policy written and ready to go.
- High-Quality Screenshots: Make sure you have compelling screenshots for every required device size. Don't skimp here—this is your marketing material.
- A Polished App Icon: Your icon needs to be perfectly formatted and look sharp. It's the first thing users will see.
- A Test Account: If your app requires a login, you must provide Apple and Google with a working test account. They can't review what they can't access.
The review process itself can take anywhere from a few hours to a few days. While you're waiting, don't just sit on your hands! You can deploy the web version of your app. With Expo, pushing your web build to a service like Vercel or Netlify is dead simple. This gives your users instant access on the web while the mobile versions clear the review process, ensuring you get your product to market as fast as possible.
Common Questions About Building an App
Whenever I talk to founders or developers about kicking off a new app project, the same questions always come up. It makes sense. You're trying to move fast, make smart decisions, and avoid common pitfalls, especially when using modern tools like React Native.
Let's break down some of the big ones I hear all the time.
How Much Does It Really Cost to Build an App from Scratch?
This is the big one, right? The honest answer is that it's a massive range. A simple Minimum Viable Product (MVP) built from scratch could start around $10,000, but a complex app with a ton of features can easily soar past $250,000. The final number really boils down to how complex your features are, how many platforms you’re targeting, and developer rates.
This is where a starter kit like AppLighter just flips the whole script. Think about all the time spent on setting up authentication, navigation, and talking to a backend. AppLighter gives you all of that out of the box, production-ready. You’re not just saving money; you're saving hundreds of hours of grunt work, which lets you pour your budget into the features that actually make your app special.
The real cost of an app isn't just the final invoice. It's the countless hours spent on boilerplate code that doesn't add a single ounce of unique value to your product. A starter kit slashes that hidden cost and gets you to market faster.
Is React Native a Good Choice for a High-Performance App?
Absolutely. The old "native vs. React Native" performance debate is pretty much over. React Native has grown up a lot and now powers massive apps from companies like Meta, Microsoft, and Shopify. For 99% of apps out there, your users will never be able to tell the difference between a React Native app and a fully native one.
Plus, the ecosystem around it is incredible. Tools like Expo take away so much of the pain of dealing with native build configurations. It helps ensure your app runs smoothly and consistently on both iOS and Android, all from one set of code.
What Are the Biggest Challenges of Launching on the App Stores?
Getting your app approved by Apple and Google can feel like a final exam you didn't study for. It's rarely the code that trips people up; it’s the bureaucracy and the ever-changing rules of the App Store and Play Store.
From my experience, here are the most common stumbling blocks:
- Asset Headaches: Getting your app icons and screenshots perfectly sized for every single device is tedious and surprisingly easy to mess up.
- Policy Purgatory: Your privacy policy has to be crystal clear, easy to find, and linked correctly in all the right places. One mistake here can get you rejected flat out.
- In-App Purchase Puzzles: Setting up products and subscriptions is notoriously finicky. The review teams scrutinize this part of your app very carefully.
This is another huge win for using a modern stack. Expo and its EAS Build service handle a ton of the grunt work for you. It automates the messy parts of creating the final app bundles, taking a lot of the guesswork out of meeting the stores' technical requirements.
Can I Use a Starter Kit If I Am Not an Expert Developer?
Yes, and honestly, that’s one of the best use cases. Starter kits like AppLighter are great for pros who want to move faster, but they're a lifesaver for founders or developers who are still finding their footing.
All the tricky architectural decisions—authentication, state management, navigation—are already made and implemented by experts. It gives you a solid, scalable foundation to build on. Instead of spending weeks trying to figure out how to wire up a login screen, you can start building the features for your actual app on day one.
Ready to skip the setup and start building immediately? AppLighter provides the ultimate head start with a production-ready Expo and React Native foundation. Check it out at https://www.applighter.com and launch your app faster.
Related Articles

How to Create a Website App with React Native and Expo
Learn how to create a website app using a modern, mobile-first approach with React Native and Expo. This guide covers setup, auth, AI, and deployment.

Mobile App Development Cost Calculator Guide
Use our mobile app development cost calculator to get a realistic budget estimate. Learn the key factors that drive app costs and how to save money.
Mobile App Tech Stack: How to Choose the Best mobile app tech stack
Explore how to choose a mobile app tech stack that fits your goals. This concise guide outlines layers, trade-offs, and how to accelerate MVP development.